表单
发布于 2015-08-27 16:21:42 | 513 次阅读 | 评论: 0 | 来源: 网络整理
对开发来说处理HTML表单是一个常见又充满挑战的任务。Symfony整合的的Form组件将处理表单变得更简单。这一章,你将从0开始创建一个复杂的表单,并从过程中学到许多牛逼的功能。
注解
Symfony表单组件是可以独立于框架而单独存在的库。想要知道更多信息请上GitHub看 Form component documentation
创建一个简单表单
假设你当前要实现一个任务列表这么个功能,你的用户总得创建或者修改任务吧,所以你得创建个表单。不过在你开始之前,先来看看代表一个任务的 Task 类。
// src/AppBundle/Entity/Task.php
namespace AppBundleEntity;

class Task
{
    protected $task;
    protected $dueDate;

    public function getTask()
    {
        return $this->task;
    }

    public function setTask($task)
    {
        $this->task = $task;
    }

    public function getDueDate()
    {
        return $this->dueDate;
    }

    public function setDueDate(DateTime $dueDate = null)
    {
        $this->dueDate = $dueDate;
    }
}
这就是一个平淡无奇的经典PHP对象,跟Symfony或者其他库都不占边。这就是一个你用来解决某一个问题(表示一个任务对象)的普通对象而已。不过等到你看完这章节的时候,你就知道怎么提交数据到 Task 对象里(通过HTML表单),校验数据的正确性,而且还将它存到数据库里。
配置表单
目前有了 Task 类,下一步创建HTML表单。在Symfony里,这一步将通过创建一个表单对象后然后在模板里渲染它来实现。现在可以直接在Controller里完成:
// src/AppBundle/Controller/DefaultController.php
namespace AppBundleController;
use SymfonyBundleFrameworkBundleControllerController;
use AppBundleEntityTask;
use SymfonyComponentHttpFoundationRequest;
class DefaultController extends Controller
{
public function newAction(Request $request)
{
// create a task and give it some dummy data for this example
$task = new Task();
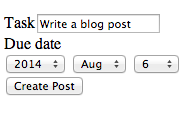
$task->setTask('Write a blog post');
$task->setDueDate(new DateTime('tomorrow'));
$form = $this->createFormBuilder($task)
->add('task', 'text')
->add('dueDate', 'date')
->add('save', 'submit', array('label' => 'Create Task'))
->getForm();
return $this->render('default/new.html.twig', array(
'form' => $form->createView(),
));
}
}
小技巧
此例展示如何在Controller里直接创建form,接下来在 “ 创建表单类 ” 小节里您将了解更推荐更有复用性的方法:在单独的类里创建表单。
创建表单不需要太多代码因为Symfony的“表单创建器”做了创建表单工作。表单创建器的目的就是让你想写“食谱”一样定义表单,然后就没有然后了,创建器来做剩下的重活儿。
在这个例子里,你在表单中添加了 task 和 dueDate 两个字段,正好对应了 Task 类类的两个属性。同时你也定义了两个字段的显示类型(比如 text,date),决定了该用什么HTML标签来生成字段。
最后,你添加好了一个的提交按钮,还是自定义按钮文字的呢。
2.3 新版功能: 从Symfony 2.3开始支持创建提交按钮,之前的版本你得自己手写HTML代码
Symfony内置超多字段类型,之后我们会介绍(请看 内置表单字段类型)。
生成表单
创建好表单后让我们来展现它,我们将传递表单的“view”对象给模板(注意 $form->createView() )然后使用form相关的助手函数:
- Twig
{# app/Resources/views/default/new.html.twig #} {{ form_start(form) }} {{ form_widget(form) }} {{ form_end(form) }} - PHP
<!-- app/Resources/views/default/new.html.php -->
<?php echo $view['form']->start($form) ?>
<?php echo $view['form']->widget($form) ?>
<?php echo $view['form']->end($form) ?>
注解
例子里假设你通过“POST”发把表单提交到同一个URL中,之后你会了解如果修改form的action和method属性
三行搞定!
form_start(form)-
显示form的开始tag,如有上传文件字段还会包含enctype属性哦
form_widget(form)-
显示所有的字段,包括字段本身和label标签,以及错误信息
form_end(form)-
显示表单结束的tag以及所有表单里有,但是目前还没有被显示的字段。这个功能超级对于显示隐藏字段超级好用,比如说 CSRF Protection
参见
目前虽然代码简单,但是还不够灵活。一般来说你还是需要了解如何单独显示每一个表单字段,来完全控制你的表单的样子。请移步“ 在模板里生成表单 ”了解
继续之前,注意 task 输入框里的值是如何从 $task 对象里获取过来的。form的第一个职责就是从对象属性里获取数据,并且绑定到表单对应的字段的值
小技巧
Form可以非常机制到连 getTask 和 setTask 方法都认得。除了`public`的属性,其他的都需要getter和setter,否则form不能读写属性的数据。如果是布尔类型的,你可以用isser或者hasser,比如说 isPublished() 或者 hasReminder()
表单提交的处理
Form的第二职责是将用户提交数据转化回对象,为此表单需将用户用户提交数据写入表对象中:
// ...
use SymfonyComponentHttpFoundationRequest;

public function newAction(Request $request)
{
    // just setup a fresh $task object (remove the dummy data)
    $task = new Task();

    $form = $this->createFormBuilder($task)
        ->add('task', 'text')
        ->add('dueDate', 'date')
        ->add('save', 'submit', array('label' => 'Create Task'))
        ->getForm();

    $form->handleRequest($request);

    if ($form->isValid()) {
        // perform some action, such as saving the task to the database

        return $this->redirectToRoute('task_success');
    }

    // ...
}
2.3 新版功能: 从Symfony 2.3开始引入 handleRequest() 方法之前需要将 $request 传入 submit 方法,如今已不推荐,并且Symfony 3.0里会完全去掉此方法。请移步 Passing a Request to Form::submit() (Deprecated) 查看更多信息。
此控制器展现了除了表单的常见思路,包含3中方式:
-
当页面被载入时,表单只是被创建然后被显示。
handleRequest()方法能感知表单没有被提交,然后直接让isValid()返回false -
如果用户提交表单,
handleRequest()也能感知到,然后立马把提交的数据转换成$task对象task和dueDate属性的值。当然如果数据校验出问题了(数据校验将在下一小节介绍)isValid()方法也会返回false,然后表单将重新传给模板重新显示,并且包含了所有错误信息。注解
你可以使用
isSubmitted()来检查表单是否被提交,无论表单能否通过校验。 -
如果用户再次提交表单信息,提交的数据也在此写入表单对象中,如果这次通过了校验,那么
isValid会返回true了,我们便可以通过$task对象在跳转到“提交成功”页之前做一些事情(比如存个库啥的)注解
表单成功提交跳转到其他页面有一个好处就是防止用户点击“刷新”按钮重复提交数据
参见
如果你想控制表单在什么时候提交,以及提交什么数据到表单对象,请阅读 submit() 以及 in the cookbook 。
表单验证
在之前的小节里,你了解到了用户会提交合法和非法的数据。在Symfony框架里,数据校验是配置在对象上面的,(比如 Task )。换句话说,不是验证你的“表单”数据,而是验证你的 $task 对象是不是合法的。 $form->isValid() 也只是一个判断 $task 对象是否是合法对象的快捷方式而已。
校验是通过添加一组规则(称之为校验规则)到类上实现的。为了演示用法,添加一些检验规则,让 task 属性不能为空,让 dueDate 属性也不能为空,并且还必须是个合法的时间对象。
- YAML
# AppBundle/Resources/config/validation.yml AppBundleEntityTask: properties: task: - NotBlank: ~ dueDate: - NotBlank: ~ - Type: DateTime - Annotations
// AppBundle/Entity/Task.php use SymfonyComponentValidatorConstraints as Assert; class Task { /** * @AssertNotBlank() */ public $task; /** * @AssertNotBlank() * @AssertType("DateTime") */ protected $dueDate; } - XML
<!-- AppBundle/Resources/config/validation.xml --> <?xml version="1.0" encoding="UTF-8"?> <constraint-mapping xmlns="http://symfony.com/schema/dic/constraint-mapping" xmlns:xsi="http://www.w3.org/2001/XMLSchema-instance" xsi:schemaLocation="http://symfony.com/schema/dic/constraint-mapping http://symfony.com/schema/dic/constraint-mapping/constraint-mapping-1.0.xsd"> <class name="AppBundleEntityTask"> <property name="task"> <constraint name="NotBlank" /> </property> <property name="dueDate"> <constraint name="NotBlank" /> <constraint name="Type">DateTime</constraint> </property> </class> </constraint-mapping> - PHP
// AppBundle/Entity/Task.php
use SymfonyComponentValidatorMappingClassMetadata;
use SymfonyComponentValidatorConstraintsNotBlank;
use SymfonyComponentValidatorConstraintsType;

class Task
{
    // ...

    public static function loadValidatorMetadata(ClassMetadata $metadata)
    {
        $metadata->addPropertyConstraint('task', new NotBlank());

        $metadata->addPropertyConstraint('dueDate', new NotBlank());
        $metadata->addPropertyConstraint(
            'dueDate',
            new Type('DateTime')
        );
    }
}
搞定!如果你重新提交非法数据,你会在表单上看到错误提示。
HTML5 验证
对于HTML5来说,许多浏览器已经实现了在客户端做本地校验。最常见的就是在表单字段上添加 required 属性。只要浏览器支持此HTML5新属性,就会提示你必须输入此字段才能提交。
虽然在客户端通过HTML也可以添加校验了,但有时你也许要把客户端的校验关闭,比如说在测试服务器端的校验功能的时候。此时需要给form标签添加 novalidate 属性,或者在提交按钮上添加 formnovalidate 属性。
- Twig
{# app/Resources/views/default/new.html.twig #} {{ form(form, {'attr': {'novalidate': 'novalidate'}}) }} - PHP
<!-- app/Resources/views/default/new.html.php -->
<?php echo $view['form']->form($form, array(
    'attr' => array('novalidate' => 'novalidate'),
)) ?>
校验是一个非常牛逼的功能,他有单独的章节介绍: dedicated chapter
验证规则组
如果你的对象使用了 validation groups ,你将在表单里设置需要使用哪个校验组来校验。
$form = $this->createFormBuilder($users, array(
    'validation_groups' => array('registration'),
))->add(...);
2.7 新版功能: configureOptions() 方法是在Symfony 2.7里加入的,之前得用 setDefaultOptions() 方法。
如果你正创建 form classes (这是最佳实践),你需要添加以下代码到 configureOptions() 方法:
use SymfonyComponentOptionsResolverOptionsResolver;

public function configureOptions(OptionsResolver $resolver)
{
    $resolver->setDefaults(array(
        'validation_groups' => array('registration'),
    ));
}
在这两种情况下, 只有 registration 校验组会被使用。
关闭验证功能
2.3 新版功能: 关闭 validation_groups 的功能于Symfony 2.3时加入。
有时你需要忽略校验,此时你可以设置 validation_groups 选项为 false:
use SymfonyComponentOptionsResolverOptionsResolver;

public function configureOptions(OptionsResolver $resolver)
{
    $resolver->setDefaults(array(
        'validation_groups' => false,
    ));
}
注意一点如果你这么设置后,表单依然会跑一些基础检查。比如提交文件是否太大,或者一些必填项没填。如果你想完全忽略任何检查,你可以使用 POST_SUBMIT event 。
基于提交数据的验证规则分组
如果你程序要一些逻辑来决定使用什么校验组(比如通过提交的数据),你可以通过给 validation_groups 指定回调函数的方式实现。
use SymfonyComponentOptionsResolverOptionsResolver;

// ...
public function configureOptions(OptionsResolver $resolver)
{
    $resolver->setDefaults(array(
        'validation_groups' => array(
            'AppBundleEntityClient',
            'determineValidationGroups',
        ),
    ));
}
在表单提交后,进行校验前, Client 类的 determinValidationGroups() 方法将会被调用。表单对象将被作为一个参数(请看下一个例子)被传如该方法。你也可以直接传入匿名方法。
use AcmeAcmeBundleEntityClient;
use SymfonyComponentFormFormInterface;
use SymfonyComponentOptionsResolverOptionsResolver;

// ...
public function configureOptions(OptionsResolver $resolver)
{
    $resolver->setDefaults(array(
        'validation_groups' => function(FormInterface $form) {
            $data = $form->getData();
            if (Client::TYPE_PERSON == $data->getType()) {
                return array('person');
            }

            return array('company');
        },
    ));
}
使用 validation_groups 参数来重载默认的校验组。如果你也希望使用默认的校验规则,你需要调整一些选项:
use AcmeAcmeBundleEntityClient;
use SymfonyComponentFormFormInterface;
use SymfonyComponentOptionsResolverOptionsResolver;

// ...
public function configureOptions(OptionsResolver $resolver)
{
    $resolver->setDefaults(array(
        'validation_groups' => function(FormInterface $form) {
            $data = $form->getData();
            if (Client::TYPE_PERSON == $data->getType()) {
                return array('Default', 'person');
            }

            return array('Default', 'company');
        },
    ));
}
你可以找到更多的关于校验组以及默认校验的信息在 validation groups
内置表单字段类型
Symfony自带一大波表单字段类型,几乎涵盖所有你会遇到的所有需求
Field Groups
表单字段选项
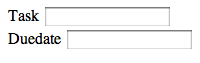
每一个字段类型都有一堆选项。比如说 dueDate 字段就被显示成三个下拉菜单。不过, date field 可以被设置为一个文字输入框,这样用户就可以直接输入时间文字了:
->add('dueDate', 'date', array('widget' => 'single_text'))
每一个表单字段有一堆选项独有的选项可以设置,它们在文档里都可以查到。
required 选项
最常见的选项就是 requried ,任何字段都可以使用它。 required 默认为 true ,表示支持HTML5的浏览器将在客户端设置此字段不能不填。如果你不想使用这个功能,你可以设置 required 为 false , 或者 disable HTML5 validation 。
注意设置 required 为 true 并 不会 触发服务器端的非空校验。或者说,如果客户端太旧不支持HTML5,数据依然会提交,并且如果你不使用 NotBlank 和 NotNull 这样的校验规则, 依然算通过校验。
换句话说, required 虽好,服务器端校验 更 需要
label 选项
表单项文字可以通过 label 选项设置,同样是任何类型的字段都可以用它。
->add('dueDate', 'date', array(
    'widget' => 'single_text',
    'label'  => 'Due Date',
))
label也可以在模板中设置,如下所示,如果你不想让某个label跟你的输入框一起显示,你可以通过设置其为 false 来关闭它。
表单字段类型自动预测
目前你已经给 Task 类添加了校验,Symfony就已经知道很多表单字段信息。Symfony还可以“推测”表单字段应该是什么类型,然后自动为你设置。在此例中,Symfony通过校验规则推测出 task 字段应该是 text 类型,而 dueDate 是 date 类型:
public function newAction()
{
    $task = new Task();

    $form = $this->createFormBuilder($task)
        ->add('task')
        ->add('dueDate', null, array('widget' => 'single_text'))
        ->add('save', 'submit')
        ->getForm();
}
如果你忽略 add() 的第二个参数(或者传null给它),“推测”功能便会开启。如果你传入了选项到第三个参数(上面 dueDate 就是这么做的),这些选项就会使用在被推测出来的字段上。
警告
如果你的表单将使用某个特别的校验组,字段类型推测功能依然是从所有的验证规则里去猜测你的字段类型(即包括所使用的校验规则之外的规则)。
表单字段选项自动预测
除了能推测类型,Symfony也可以推测选项。
小技巧
当设置完这些选项后,在生成HTML代码时会生成响应的HTML5属性。只不过,他并不生成相同功能的,服务器端的校验规则(比如说 AssetLength)。所以你得自己添加服务端的校验。这些字段设置可以被它的校验信息推测出来。
required-
required选项可以通过校验规则猜测出来(比如NotBlank或者NotNull)甚至是通过Doctrine的配置信息(比如nullable)。非常方便得让你的客户端和服务端有相同的校验规则。 max_length-
如果是文字输入框,
max_length将被推测出来(通过Length或者Range)甚至是Doctrine的配置信息 (通过响应属性的 length 信息)。
注解
这些字段选项 仅仅 在让Symfony猜测字段类型的时候才会管用(即忽略 add() 的第二个参数)。
如果你想改变其中某一个猜测的选项,你可以通过传入选项数组去覆盖它。
->add('task', null, array('attr' => array('maxlength' => 4)))
在模板里生成表单
目前,你已经知道如何用一行代码生成整个表单。但你有更灵活的方式去生成表单:
- Twig
{# app/Resources/views/default/new.html.twig #} {{ form_start(form) }} {{ form_errors(form) }} {{ form_row(form.task) }} {{ form_row(form.dueDate) }} {{ form_end(form) }} - PHP
<!-- app/Resources/views/default/newAction.html.php -->
<?php echo $view['form']->start($form) ?>
    <?php echo $view['form']->errors($form) ?>

    <?php echo $view['form']->row($form['task']) ?>
    <?php echo $view['form']->row($form['dueDate']) ?>
<?php echo $view['form']->end($form) ?>
同样你也知道了 form_start() 和 form_end() 方法,但其他的方法是干嘛用的?
form_errors(form)-
显示整个表单的错误(如何参数是某个表单字段,就是此字段的错误)。
form_row(form.dueDate)-
显示label,错误,以及控件,默认情况会被一个
div包起来
主要工作都是由 form_row 助手完成的,他将显示一个label,错误,以及表单的控件,并默认被一个 div 包起来。在 表单主题 中您将知道如何在各个层面自定义它的显示。
小技巧
您可以通过 form.vars.value 来访问当前的数据:
- Twig
{{ form.vars.value.task }} - PHP
<?php echo $form->vars['value']->getTask() ?>
手动生成每一个表单字段
The form_row helper is great because you can very quickly render each field of your form (and the markup used for the “row” can be customized as well). But since life isn’t always so simple, you can also render each field entirely by hand. The end-product of the following is the same as when you used the form_row helper:
- Twig
{{ form_start(form) }} {{ form_errors(form) }} <div> {{ form_label(form.task) }} {{ form_errors(form.task) }} {{ form_widget(form.task) }} </div> <div> {{ form_label(form.dueDate) }} {{ form_errors(form.dueDate) }} {{ form_widget(form.dueDate) }} </div> <div> {{ form_widget(form.save) }} </div> {{ form_end(form) }} - PHP
<?php echo $view['form']->start($form) ?>

    <?php echo $view['form']->errors($form) ?>

    <div>
        <?php echo $view['form']->label($form['task']) ?>
        <?php echo $view['form']->errors($form['task']) ?>
        <?php echo $view['form']->widget($form['task']) ?>
    </div>

    <div>
        <?php echo $view['form']->label($form['dueDate']) ?>
        <?php echo $view['form']->errors($form['dueDate']) ?>
        <?php echo $view['form']->widget($form['dueDate']) ?>
    </div>

    <div>
        <?php echo $view['form']->widget($form['save']) ?>
    </div>

<?php echo $view['form']->end($form) ?>
If the auto-generated label for a field isn’t quite right, you can explicitly specify it:
- Twig
{{ form_label(form.task, 'Task Description') }} - PHP
<?php echo $view['form']->label($form['task'], 'Task Description') ?>
Some field types have additional rendering options that can be passed to the widget. These options are documented with each type, but one common options is attr, which allows you to modify attributes on the form element. The following would add the task_field class to the rendered input text field:
- Twig
{{ form_widget(form.task, {'attr': {'class': 'task_field'}}) }} - PHP
<?php echo $view['form']->widget($form['task'], array(
    'attr' => array('class' => 'task_field'),
)) ?>
If you need to render form fields “by hand” then you can access individual values for fields such as the id, name and label. For example to get the id:
- Twig
{{ form.task.vars.id }} - PHP
<?php echo $form['task']->vars['id']?>
To get the value used for the form field’s name attribute you need to use the full_name value:
- Twig
{{ form.task.vars.full_name }} - PHP
<?php echo $form['task']->vars['full_name'] ?>
Twig函数参考
If you’re using Twig, a full reference of the form rendering functions is available in the reference manual. Read this to know everything about the helpers available and the options that can be used with each.
修改表单的method和action属性
So far, the form_start() helper has been used to render the form’s start tag and we assumed that each form is submitted to the same URL in a POST request. Sometimes you want to change these parameters. You can do so in a few different ways. If you build your form in the controller, you can use setAction() and setMethod():
$form = $this->createFormBuilder($task)
    ->setAction($this->generateUrl('target_route'))
    ->setMethod('GET')
    ->add('task', 'text')
    ->add('dueDate', 'date')
    ->add('save', 'submit')
    ->getForm();
注解
This example assumes that you’ve created a route called target_route that points to the controller that processes the form.
In 创建表单类 you will learn how to move the form building code into separate classes. When using an external form class in the controller, you can pass the action and method as form options:
$form = $this->createForm(new TaskType(), $task, array(
    'action' => $this->generateUrl('target_route'),
    'method' => 'GET',
));
Finally, you can override the action and method in the template by passing them to the form() or the form_start() helper:
- Twig
{# app/Resources/views/default/new.html.twig #} {{ form_start(form, {'action': path('target_route'), 'method': 'GET'}) }} - PHP
<!-- app/Resources/views/default/newAction.html.php -->
<?php echo $view['form']->start($form, array(
    'action' => $view['router']->generate('target_route'),
    'method' => 'GET',
)) ?>
注解
If the form’s method is not GET or POST, but PUT, PATCH or DELETE, Symfony will insert a hidden field with the name _method that stores this method. The form will be submitted in a normal POST request, but Symfony’s router is capable of detecting the _method parameter and will interpret it as a PUT, PATCH or DELETE request. Read the cookbook chapter “How to Use HTTP Methods beyond GET and POST in Routes” for more information.
创建表单类
As you’ve seen, a form can be created and used directly in a controller. However, a better practice is to build the form in a separate, standalone PHP class, which can then be reused anywhere in your application. Create a new class that will house the logic for building the task form:
// src/AppBundle/Form/Type/TaskType.php
namespace AppBundleFormType;

use SymfonyComponentFormAbstractType;
use SymfonyComponentFormFormBuilderInterface;

class TaskType extends AbstractType
{
    public function buildForm(FormBuilderInterface $builder, array $options)
    {
        $builder
            ->add('task')
            ->add('dueDate', null, array('widget' => 'single_text'))
            ->add('save', 'submit');
    }

    public function getName()
    {
        return 'task';
    }
}
警告
The getName() method returns the identifier of this form “type”. These identifiers must be unique in the application. Unless you want to override a built-in type, they should be different from the default Symfony types and from any type defined by a third-party bundle installed in your application. Consider prefixing your types with app_ to avoid identifier collisions.
This new class contains all the directions needed to create the task form. It can be used to quickly build a form object in the controller:
// src/AppBundle/Controller/DefaultController.php

// add this new use statement at the top of the class
use AppBundleFormTypeTaskType;

public function newAction()
{
    $task = ...;
    $form = $this->createForm(new TaskType(), $task);

    // ...
}
Placing the form logic into its own class means that the form can be easily reused elsewhere in your project. This is the best way to create forms, but the choice is ultimately up to you.
设置 data_class
Every form needs to know the name of the class that holds the underlying data (e.g. AppBundleEntityTask). Usually, this is just guessed based off of the object passed to the second argument to createForm (i.e. $task). Later, when you begin embedding forms, this will no longer be sufficient. So, while not always necessary, it’s generally a good idea to explicitly specify the data_class option by adding the following to your form type class:
use SymfonyComponentOptionsResolverOptionsResolver;

public function configureOptions(OptionsResolver $resolver)
{
    $resolver->setDefaults(array(
        'data_class' => 'AppBundleEntityTask',
    ));
}
小技巧
When mapping forms to objects, all fields are mapped. Any fields on the form that do not exist on the mapped object will cause an exception to be thrown.
In cases where you need extra fields in the form (for example: a “do you agree with these terms” checkbox) that will not be mapped to the underlying object, you need to set the mapped option to false:
use SymfonyComponentFormFormBuilderInterface;

public function buildForm(FormBuilderInterface $builder, array $options)
{
    $builder
        ->add('task')
        ->add('dueDate', null, array('mapped' => false))
        ->add('save', 'submit');
}
Additionally, if there are any fields on the form that aren’t included in the submitted data, those fields will be explicitly set to null.
在Controller里可以这样访问表单字段数据:
$form->get('dueDate')->getData();
另外,没有被映射的字段也可以直接被修改:
$form->get('dueDate')->setData(new DateTime());
将表单定义为Service
将表单定义为服务是一个好习惯,他将让表单变得更好用
注解
Services and the service container will be handled later on in this book. Things will be more clear after reading that chapter.
- YAML
# src/AppBundle/Resources/config/services.yml services: acme_demo.form.type.task: class: AppBundleFormTypeTaskType tags: - { name: form.type, alias: task } - XML
<!-- src/AppBundle/Resources/config/services.xml --> <?xml version="1.0" encoding="UTF-8" ?> <container xmlns="http://symfony.com/schema/dic/services" xmlns:xsi="http://www.w3.org/2001/XMLSchema-instance" xsi:schemaLocation="http://symfony.com/schema/dic/services http://symfony.com/schema/dic/services/services-1.0.xsd"> <services> <service id="acme_demo.form.type.task" class="AppBundleFormTypeTaskType"> <tag name="form.type" alias="task" /> </service> </services> </container> - PHP
// src/AppBundle/Resources/config/services.php
$container
    ->register(
        'acme_demo.form.type.task',
        'AppBundleFormTypeTaskType'
    )
    ->addTag('form.type', array(
        'alias' => 'task',
    ))
;
搞定! 现在你可以直接在Controller里使用你自己的表单类型
// src/AppBundle/Controller/DefaultController.php
// ...

public function newAction()
{
    $task = ...;
    $form = $this->createForm('task', $task);

    // ...
}
甚至可以在其他表单中使用:
// src/AppBundle/Form/Type/ListType.php
// ...

class ListType extends AbstractType
{
    public function buildForm(FormBuilderInterface $builder, array $options)
    {
        // ...

        $builder->add('someTask', 'task');
    }
}
移步至 Creating your Field Type as a Service 了解更多。
表单和Doctrine
The goal of a form is to translate data from an object (e.g. Task) to an HTML form and then translate user-submitted data back to the original object. As such, the topic of persisting the Task object to the database is entirely unrelated to the topic of forms. But, if you’ve configured the Task class to be persisted via Doctrine (i.e. you’ve added mapping metadata for it), then persisting it after a form submission can be done when the form is valid:
if ($form->isValid()) {
    $em = $this->getDoctrine()->getManager();
    $em->persist($task);
    $em->flush();

    return $this->redirectToRoute('task_success');
}
你可以不用创建 $task 对象而直接从表单对象中获取它
$task = $form->getData();
想了解更多?请看 Doctrine ORM chapter 。
The key thing to understand is that when the form is submitted, the submitted data is transferred to the underlying object immediately. If you want to persist that data, you simply need to persist the object itself (which already contains the submitted data).
表单嵌表单
Often, you’ll want to build a form that will include fields from many different objects. For example, a registration form may contain data belonging to a User object as well as many Address objects. Fortunately, this is easy and natural with the Form component.
只嵌单个表单
假如 Task 属于某个 Category 对象,首先我们得有一个 Category 对象:
// src/AppBundle/Entity/Category.php
namespace AppBundleEntity;

use SymfonyComponentValidatorConstraints as Assert;

class Category
{
    /**
     * @AssertNotBlank()
     */
    public $name;
}
接下来,给 Task 类添加 category 属性:
// ...

class Task
{
    // ...

    /**
     * @AssertType(type="AppBundleEntityCategory")
     * @AssertValid()
     */
    protected $category;

    // ...

    public function getCategory()
    {
        return $this->category;
    }

    public function setCategory(Category $category = null)
    {
        $this->category = $category;
    }
}
小技巧
The Valid Constraint has been added to the property category. This cascades the validation to the corresponding entity. If you omit this constraint the child entity would not be validated.
Now that your application has been updated to reflect the new requirements, create a form class so that a Category object can be modified by the user:
// src/AppBundle/Form/Type/CategoryType.php
namespace AppBundleFormType;

use SymfonyComponentFormAbstractType;
use SymfonyComponentFormFormBuilderInterface;
use SymfonyComponentOptionsResolverOptionsResolver;

class CategoryType extends AbstractType
{
    public function buildForm(FormBuilderInterface $builder, array $options)
    {
        $builder->add('name');
    }

    public function configureOptions(OptionsResolver $resolver)
    {
        $resolver->setDefaults(array(
            'data_class' => 'AppBundleEntityCategory',
        ));
    }

    public function getName()
    {
        return 'category';
    }
}
The end goal is to allow the Category of a Task to be modified right inside the task form itself. To accomplish this, add a category field to the TaskType object whose type is an instance of the new CategoryType class:
use SymfonyComponentFormFormBuilderInterface;

public function buildForm(FormBuilderInterface $builder, array $options)
{
    // ...

    $builder->add('category', new CategoryType());
}
The fields from CategoryType can now be rendered alongside those from the TaskType class.
使用跟显示 Task 同样的方式来显示 Category 的表单字段:
- Twig
{# ... #} <h3>Category</h3> <div class="category"> {{ form_row(form.category.name) }} </div> {# ... #} - PHP
<!-- ... -->

<h3>Category</h3>
<div class="category">
    <?php echo $view['form']->row($form['category']['name']) ?>
</div>

<!-- ... -->
When the user submits the form, the submitted data for the Category fields are used to construct an instance of Category, which is then set on the category field of the Task instance.
The Category instance is accessible naturally via $task->getCategory() and can be persisted to the database or used however you need.
内嵌一组表单
You can also embed a collection of forms into one form (imagine a Category form with many Product sub-forms). This is done by using the collection field type.
For more information see the “How to Embed a Collection of Forms” cookbook entry and the collection field type reference.
表单主题
Every part of how a form is rendered can be customized. You’re free to change how each form “row” renders, change the markup used to render errors, or even customize how a textarea tag should be rendered. Nothing is off-limits, and different customizations can be used in different places.
Symfony uses templates to render each and every part of a form, such as label tags, input tags, error messages and everything else.
In Twig, each form “fragment” is represented by a Twig block. To customize any part of how a form renders, you just need to override the appropriate block.
In PHP, each form “fragment” is rendered via an individual template file. To customize any part of how a form renders, you just need to override the existing template by creating a new one.
To understand how this works, customize the form_row fragment and add a class attribute to the div element that surrounds each row. To do this, create a new template file that will store the new markup:
- Twig
{# app/Resources/views/form/fields.html.twig #} {% block form_row %} {% spaceless %} <div class="form_row"> {{ form_label(form) }} {{ form_errors(form) }} {{ form_widget(form) }} </div> {% endspaceless %} {% endblock form_row %} - PHP
<!-- app/Resources/views/form/form_row.html.php -->
<div class="form_row">
    <?php echo $view['form']->label($form, $label) ?>
    <?php echo $view['form']->errors($form) ?>
    <?php echo $view['form']->widget($form, $parameters) ?>
</div>
The form_row form fragment is used when rendering most fields via the form_row function. To tell the Form component to use your new form_row fragment defined above, add the following to the top of the template that renders the form:
- Twig
{# app/Resources/views/default/new.html.twig #} {% form_theme form 'form/fields.html.twig' %} {% form_theme form 'form/fields.html.twig' 'form/fields2.html.twig' %} {# ... render the form #} - PHP
<!-- app/Resources/views/default/new.html.php -->
<?php $view['form']->setTheme($form, array('form')) ?>

<?php $view['form']->setTheme($form, array('form', 'form2')) ?>

<!-- ... render the form -->
The form_theme tag (in Twig) “imports” the fragments defined in the given template and uses them when rendering the form. In other words, when the form_row function is called later in this template, it will use the form_row block from your custom theme (instead of the default form_row block that ships with Symfony).
Your custom theme does not have to override all the blocks. When rendering a block which is not overridden in your custom theme, the theming engine will fall back to the global theme (defined at the bundle level).
如果提供了多个自定义主题,他们将会按照顺序挨个尝试使用,如果所有不适用,将会使用全局主题
要自定义表单某个部分的显示,你只需要重载合适的片段代码。下一个小结会告诉你应该重载哪一部分的代码。
请移步 How to Customize Form Rendering 了解更多。
表单函数命名规则
Symfony会把表单的每一个部分都生成HTML表单代码,比如错误信息,表单名称,等等。而定义他们的是某一个Twig文件的表单模板模块集合,或者一堆PHP写的模板文件。
Twig里每一个表单模块都定义在 Twig Bridge 的一个模板文件里(比如 form_div_layout.html.twig ),你可以在此文件里看到表单的每一个字段的默认模板。
在PHP代码里,表单片段都是写单独的模板文件。默认都放在framework bundle的 Resources/views/Form 中( view on GitHub )。
每一个片段名都是同样的规律:分成两个部分,并且用一个下划线分割。一些例子:
form_row- used byform_rowto render most fields;textarea_widget- used byform_widgetto render atextareafield type;form_errors- used byform_errorsto render errors for a field;
Each fragment follows the same basic pattern: type_part. The type portion corresponds to the field type being rendered (e.g. textarea, checkbox, date, etc) whereas the part portion corresponds to what is being rendered (e.g. label, widget, errors, etc). By default, there are 4 possible parts of a form that can be rendered:
label |
(比如 |
显示表单的label |
widget |
(比如 |
显示表单字段的HTML |
errors |
(比如 |
显示字段错误信息 |
row |
(比如 |
显示表单字段的row(包括 label, widget 已经 errors) |
注解
事实上有两个 部分 —— rows 和 rest —— 只不过你应该很少去重构他们。
只要知道字段的类型叫什么(比如 textarea),以及你想自定义的地方(比如 widget),你就可以猜出它的名字重载它了 (比如 textarea_widget)。
Template片段继承
某些情况,你想自定义的片段可能会找不到,比如说,默认模板没有 textarea_errors 片段。那么textarea的错误怎么自定义呢?
答案是: 通过 form_errors 片段。当Symfony显示textare错误的时候,它会先查找 textarea_errors 片段,然后查找 form_errors。每一个表单字段都有一个 父 类型( textarea 的父类是 text,text 的父类是 form),如果本身的的错误类型无法找到,Symfony将会使用父类的错误类型。
所以如果要只重载 textarea 的错误信息,复制 form_errors 片段,将其重命名为 textarea_errros 然后修改它。如果要重载 所有 的错误信息,复制后直接修改 form_errors 。
小技巧
每一个表单类型的“parent”类型可参考 form type reference
全局表单主题
在以上的例子中,你需要用 form_theme 助手方法(Twig)来引入自定义的模板片段。你也可以让Symfony在整个项目里都加载你自定义的模板。
Twig
你需要修改项目的配置文件,来自动包含你在 fields.html.twig 文件里定义的模板:
- YAML
# app/config/config.yml twig: form_themes: - 'form/fields.html.twig' # ... - XML
<!-- app/config/config.xml --> <?xml version="1.0" encoding="UTF-8" ?> <container xmlns="http://symfony.com/schema/dic/services" xmlns:xsi="http://www.w3.org/2001/XMLSchema-instance" xmlns:twig="http://symfony.com/schema/dic/twig" xsi:schemaLocation="http://symfony.com/schema/dic/services http://symfony.com/schema/dic/services/services-1.0.xsd http://symfony.com/schema/dic/twig http://symfony.com/schema/dic/twig/twig-1.0.xsd"> <twig:config> <twig:theme>form/fields.html.twig</twig:theme> <!-- ... --> </twig:config> </container> - PHP
// app/config/config.php
$container->loadFromExtension('twig', array(
    'form_themes' => array(
        'form/fields.html.twig',
    ),
    // ...
));
所有在 fields.html.twig 模板里的表单模块现在都可以全局使用了。
在单个Twig文件里自定义表单输出
在Twig里,你可以直接在需要自定义表单显示的模板里,修改表单某个部分的显示
{% extends 'base.html.twig' %}

{# import "_self" as the form theme #}
{% form_theme form _self %}

{# make the form fragment customization #}
{% block form_row %}
    {# custom field row output #}
{% endblock form_row %}

{% block content %}
    {# ... #}

    {{ form_row(form.task) }}
{% endblock %}
{% form_theme form _self %} 让表单可以直接在当前模板做一些自定义修改。使用此方法可以很快实现在当前模板表单自定义显示。
警告
{% form_theme form _self %} 功能 只能 在当前模板是继承其他模板的时候管用。否则,你必须设置 form_theme 到其他的模板文件。
PHP
你需要修改项目配置文件来从 app/Resources/views/Form 目录自动载入你的自定义模板
- YAML
# app/config/config.yml framework: templating: form: resources: - 'Form' # ... - XML
<!-- app/config/config.xml --> <?xml version="1.0" encoding="UTF-8" ?> <container xmlns="http://symfony.com/schema/dic/services" xmlns:xsi="http://www.w3.org/2001/XMLSchema-instance" xmlns:framework="http://symfony.com/schema/dic/symfony" xsi:schemaLocation="http://symfony.com/schema/dic/services http://symfony.com/schema/dic/services/services-1.0.xsd http://symfony.com/schema/dic/symfony http://symfony.com/schema/dic/symfony/symfony-1.0.xsd"> <framework:config> <framework:templating> <framework:form> <framework:resource>Form</framework:resource> </framework:form> </framework:templating> <!-- ... --> </framework:config> </container> - PHP
// app/config/config.php
$container->loadFromExtension('framework', array(
    'templating' => array(
        'form' => array(
            'resources' => array(
                'Form',
            ),
        ),
    )
    // ...
));
所有在 app/Resources/views/Form 目录的模板片段目前可以在全局下使用了。
CSRF保护
CSRF( Cross-site request forgery )是一种攻击者让用户在无意识下提交一些自己不应该提交的数据的攻击方式。不过CSRF可以通过在你的表单里加入CSRF Token来避免。
好消息是,Symfony会自动帮你在表单里添加以及验证CSRF token。所以你就可以在Symfony的庇护下放心用表单而不用做其他任何事情。我们上面的例子其实都已经受到了CSRF的保护!
CSRF保护原理:在表单里添加一个token字段。只有服务器和用户才知道。这将保证只有当前访问用户——而不是其他攻击者——提交了表单。Symfony将会自动校验Token的正确性
_token 表单字段是隐藏字段,并且会在 form_end() 的时候自动被生成,包括其他所有没有被显示的字段一起都被输出。
CSRF也可以被自定义,比如:
use SymfonyComponentOptionsResolverOptionsResolver;

class TaskType extends AbstractType
{
    // ...

    public function configureOptions(OptionsResolver $resolver)
    {
        $resolver->setDefaults(array(
            'data_class'      => 'AppBundleEntityTask',
            'csrf_protection' => true,
            'csrf_field_name' => '_token',
            // a unique key to help generate the secret token
            'intention'       => 'task_item',
        ));
    }

    // ...
}
如果想关闭CSRF保护,请设置表单的 csrf_protection 选项为false。当然也可以通过全局设置。请移步至 form configuration reference 小节查看过多信息。
注解
intention 为可选项,但如果给每一个表单设置不同的值,会极大提高安全性。
警告
CSRF tokens对于每一个用户都是不一样的,这也意味着如果你想使用页面缓存技术您得注意了。想了解更多请阅读 缓存带CSRF表单的页面 。
不使用类直接创建表单
大部分情况,表单都和某个对象是绑定的,而且表单提交数据将提交到对象的属性上。这在 Task 类的例子上已经看到了。
不过有时候呢,你可能不想把表单跟一个对象绑定,其实这也是可以轻松做到的:
// make sure you've imported the Request namespace above the class
use SymfonyComponentHttpFoundationRequest;
// ...

public function contactAction(Request $request)
{
    $defaultData = array('message' => 'Type your message here');
    $form = $this->createFormBuilder($defaultData)
        ->add('name', 'text')
        ->add('email', 'email')
        ->add('message', 'textarea')
        ->add('send', 'submit')
        ->getForm();

    $form->handleRequest($request);

    if ($form->isValid()) {
        // data is an array with "name", "email", and "message" keys
        $data = $form->getData();
    }

    // ... render the form
}
在默认情况下,表单就是尝试绑定一个数组,而不是对象。有两个方法你可以改变这个行为,而使用对象来替换:
-
在使用
createFormBuilder方法时将对象传入第一个参数,或者在使用createFormBuilder时将对象传入第二个参数。 -
在表单里定义好
data_class参数。
如果你 不 使用上面的方法,那么表单默认返回的数据是个数组。因为 $defaultData 不是一个对象 ( data_class 也没有被设置)。所以 $form->getData() 只能返回数组了。
小技巧
你也可以通过request对象获取POST的数据(这里为“name”),比如这样:
$request->request->get('name');
不过呢,最好还是用 getData() 方法,因为他返回的是被表单转换化过后的数据。
添加校验规则
唯一没提的是校验。通常,当你执行 $form->isValid() 时,对象上的校验规则被读取。但是你得让表和某个对象关联才行(通过 data_class,或者传递一个对象)。请见 校验 查阅更多。
但如果表单并没有关联某个对象,你如何给你的表单添加校验规则呢?
答案是你自己创建校验规则,并且将他们添加到单个的表单字段里。主要目的将在 validation chapter 得以讨论,但这里也有一个简单的演示例子:
use SymfonyComponentValidatorConstraintsLength;
use SymfonyComponentValidatorConstraintsNotBlank;

$builder
   ->add('firstName', 'text', array(
       'constraints' => new Length(array('min' => 3)),
   ))
   ->add('lastName', 'text', array(
       'constraints' => array(
           new NotBlank(),
           new Length(array('min' => 3)),
       ),
   ))
;
小技巧
如果你要使用校验组,你要不在创建表单对象时得提到 Default 组,要不设置一个合适的组
new NotBlank(array('groups' => array('create', 'update'))
总结
你已经知道所有创建表单必须知道的知识点和功能。当你使用表单时,请时刻记住表单的目的:一,将一个将对象变成用户可输入的输入框,二,将用户提交数据变回对象。
关于Form的强大还有很多可以说,比如 file uploads with Doctrine ,或者创建一堆动态的子表单 (比如通过javascript创建多个任务框)。请在手册里查看。另外,请经常参考 field type reference documentation , 里面包含了每种字段类型的各种选项解释和各种例子。