ASP.NET MVC5网站开发修改及删除文章(十)
发布于 2016-06-23 03:13:29 | 146 次阅读 | 评论: 0 | 来源: 网友投递
ASP.NET
ASP.NET 是.NET FrameWork的一部分,是一项微软公司的技术,是一种使嵌入网页中的脚本可由因特网服务器执行的服务器端脚本技术,它可以在通过HTTP请求文档时再在Web服务器上动态创建它们。 指 Active Server Pages(动态服务器页面) ,运行于 IIS(Internet Information Server 服务,是Windows开发的Web服务器)之中的程序 。
这篇文章主要介绍了ASP.NET MVC5网站开发修改及删除文章,需要的朋友可以参考下
上次做了显示文章列表,再实现修改和删除文章这部分内容就结束了,这次内容比较简单,由于做过了添加文章,修改文章非常类似,就是多了一个TryUpdateModel部分更新模型数据。
一、删除文章
由于公共模型跟,文章,附件有关联,所以这里的删除次序很重要,如果先删除模型,那么文章ModelID和附件的ModelID多会变成null,所以要先先删除文章和附件再删除公共模型。
由于公共模型和附件是一对多的关系,我们把删除公共模型和删除附件写在一起。
在BLL的BaseRepository类中有默认的Delete方法,但这个方法中仅删除模型,不会删除外键,所以在CommonModelRepository在new一个出来封印掉默认的方法。
public new bool Delete(Models.CommonModel commonModel, bool isSave = true)
  {
   if (commonModel.Attachment != null) nContext.Attachments.RemoveRange(commonModel.Attachment);
   nContext.CommonModels.Remove(commonModel);
   return isSave ? nContext.SaveChanges() > 0 : true;
  }
这个的意思是封印掉继承的Delete方法,在新的方法中如果存在附加那么先删除附件,再删除公共模型。那么如果我们还想调用基类的Delete方法怎么办?可以用base.Delete。
好了,现在可以开始删除了。
在ArticleController中添加Delete方法
/// <summary>
  /// 删除
  /// </summary>
  /// <param name="id">文章id</param>
  /// <returns></returns>
  public JsonResult Delete(int id)
  {
   //删除附件
   var _article = articleService.Find(id);
   if(_article == null) return Json(false);
   //附件列表
   var _attachmentList = _article.CommonModel.Attachment;
   var _commonModel = _article.CommonModel;
   //删除文章
   if (articleService.Delete(_article))
   {
    //删除附件文件
    foreach (var _attachment in _attachmentList)
    {
     System.IO.File.Delete(Server.MapPath(_attachment.FileParth));
    }
    //删除公共模型
    commonModelService.Delete(_commonModel);
    return Json(true);
   }
   else return Json(false);
  }
二、修改文章
这个部分跟添加文章非常类似
首先在ArticleController中添加显示编辑视图的Edit
/// <summary>
  /// 修改
  /// </summary>
  /// <param name="id"></param>
  /// <returns></returns>
  public ActionResult Edit(int id)
  {
   return View(articleService.Find(id));
  }
右键添加视图,这个跟添加类似,没什么好说的直接上代码
@section scripts{
 <script type="text/javascript" src="~/Scripts/KindEditor/kindeditor-min.js"></script>
 <script type="text/javascript">
  //编辑框
  KindEditor.ready(function (K) {
   window.editor = K.create('#Content', {
    height: '500px',
    uploadJson: '@Url.Action("Upload", "Attachment")',
    fileManagerJson: '@Url.Action("FileManagerJson", "Attachment", new { id = @Model.CommonModel.ModelID })',
    allowFileManager: true,
    formatUploadUrl: false
   });
  //首页图片
   var editor2 = K.editor({
    fileManagerJson: '@Url.Action("FileManagerJson", "Attachment", new {id=@Model.CommonModel.ModelID })'
   });
   K('#btn_picselect').click(function () {
    editor2.loadPlugin('filemanager', function () {
     editor2.plugin.filemanagerDialog({
      viewType: 'VIEW',
      dirName: 'image',
      clickFn: function (url, title) {
       var url;
       $.ajax({
        type: "post",
        url: "@Url.Action("CreateThumbnail", "Attachment")",
        data: { originalPicture: url },
        async: false,
        success: function (data) {
         if (data == null) alert("生成缩略图失败!");
         else {
          K('#CommonModel_DefaultPicUrl').val(data);
          K('#imgpreview').attr("src", data);
         }
         editor2.hideDialog();
        }
       });
      }
     });
    });
   });
  });
 </script>
}

@model Ninesky.Models.Article
@using (Html.BeginForm())
{ @Html.AntiForgeryToken()
 <div class="form-horizontal" role="form">
  <h4>添加文章</h4>
  <hr />
  @Html.ValidationSummary(true)
  <div class="form-group">
   <label class="control-label col-sm-2" for="CommonModel_CategoryID">栏目</label>
   <div class="col-sm-10">
    <input id="CommonModel_CategoryID" name="CommonModel.CategoryID" data-options="url:'@Url.Action("JsonTree", "Category", new { model="Article" })'" class="easyui-combotree" style="height: 34px; width: 280px;" value="@Model.CommonModel.CategoryID" />
      @Html.ValidationMessageFor(model => model.CommonModel.CategoryID)</div>
  </div>
  <div class="form-group">
   @Html.LabelFor(model => model.CommonModel.Title, new { @class = "control-label col-sm-2" })
   <div class="col-sm-10">
      @Html.TextBoxFor(model => model.CommonModel.Title, new { @class = "form-control" })
      @Html.ValidationMessageFor(model => model.CommonModel.Title)</div>
  </div>


  <div class="form-group">
   @Html.LabelFor(model => model.Author, new { @class = "control-label col-sm-2" })
   <div class="col-sm-10">
    @Html.TextBoxFor(model => model.Author, new { @class = "form-control" })
    @Html.ValidationMessageFor(model => model.Author)
   </div>
  </div>

  <div class="form-group">
   @Html.LabelFor(model => model.Source, new { @class = "control-label col-sm-2" })
   <div class="col-sm-10">
    @Html.TextBoxFor(model => model.Source, new { @class = "form-control" })
    @Html.ValidationMessageFor(model => model.Source)
   </div>
  </div>

  <div class="form-group">
   @Html.LabelFor(model => model.Intro, new { @class = "control-label col-sm-2" })
   <div class="col-sm-10">
    @Html.TextAreaFor(model => model.Intro, new { @class = "form-control" })
    @Html.ValidationMessageFor(model => model.Intro)
   </div>
  </div>

  <div class="form-group">
   @Html.LabelFor(model => model.Content, new { @class = "control-label col-sm-2" })
   <div class="col-sm-10">
    @Html.EditorFor(model => model.Content)
    @Html.ValidationMessageFor(model => model.Content)
   </div>
  </div>

  <div class="form-group">
   @Html.LabelFor(model => model.CommonModel.DefaultPicUrl, new { @class = "control-label col-sm-2" })
   <div class="col-sm-10">
    <img id="imgpreview" class="thumbnail" src="@Model.CommonModel.DefaultPicUrl" />
    @Html.HiddenFor(model => model.CommonModel.DefaultPicUrl)
    <a id="btn_picselect" class="easyui-linkbutton">选择…</a>
    @Html.ValidationMessageFor(model => model.CommonModel.DefaultPicUrl)
   </div>
  </div>

  <div class="form-group">
   <div class="col-sm-offset-2 col-sm-10">
    <input type="submit" value="保存" class="btn btn-default" />
   </div>
  </div>
 </div>
}
开始做后台接受代码,在ArticleController中添加如下代码。
[HttpPost]
  [ValidateInput(false)]
  [ValidateAntiForgeryToken]
  public ActionResult Edit()
  {
   int _id = int.Parse(ControllerContext.RouteData.GetRequiredString("id"));
   var article = articleService.Find(_id);
   TryUpdateModel(article, new string[] { "Author", "Source", "Intro", "Content" });
   TryUpdateModel(article.CommonModel, "CommonModel", new string[] { "CategoryID", "Title", "DefaultPicUrl" });
   if(ModelState.IsValid)
   {
    if (articleService.Update(article))
    {
     //附件处理
     InterfaceAttachmentService _attachmentService = new AttachmentService();
     var _attachments = _attachmentService.FindList(article.CommonModel.ModelID, User.Identity.Name, string.Empty,true).ToList();
     foreach (var _att in _attachments)
     {
      var _filePath = Url.Content(_att.FileParth);
      if ((article.CommonModel.DefaultPicUrl != null && article.CommonModel.DefaultPicUrl.IndexOf(_filePath) >= 0) || article.Content.IndexOf(_filePath) > 0)
      {
       _att.ModelID = article.ModelID;
       _attachmentService.Update(_att);
      }
      else
      {
       System.IO.File.Delete(Server.MapPath(_att.FileParth));
       _attachmentService.Delete(_att);
      }
     }
     return View("EditSucess", article);
    }
   }
   return View(article);
  }
详细讲解一下吧:
1、[ValidateInput(false)] 表示不验证输入内容。因为文章内容包含html代码,防止提交失败。
2、[ValidateAntiForgeryToken]是为了防止伪造跨站请求的,也就说只有本真的请求才能通过。
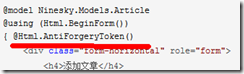
见图中的红线部分,在试图中构造验证字符串,然后再后台验证。
3、public ActionResult Edit()。看这个方法没有接收任何数据,我们再方法中使用TryUpdateModel更新模型。因为不能完全相信用户,比如如果用户构造一个CateggoryID过来,就会把文章发布到其他栏目去。

这个是在路由中获取id参数

再看这两行,略有不同
第一行直接更新article模型。第一个参数是要更新的模型,第二个参数是更新的字段。
第二行略有不同,增加了一个前缀参数,我们看视图生成的代码 @Html.TextBoxFor(model => model.CommonModel.Title 是带有前缀CommonModel的。所以这里必须使用前缀来更新视图。
三、修改文章列表
写完文章后,就要更改文章列表代码用来删除和修改文章。
打开List视图,修改部分由2处。
1、js脚本部分
<script type="text/javascript">
 $("#article_list").datagrid({
  loadMsg: '加载中……',
  pagination:true,
  url: '@Url.Action("JsonList","Article")',
  columns: [[
   { field: 'ModelID', title: 'ID', checkbox: true },
   { field: 'CategoryName', title: '栏目'},
   { field: 'Title', title: '标题'},
   { field: 'Inputer', title: '录入', align: 'right' },
   { field: 'Hits', title: '点击', align: 'right' },
   { field: 'ReleaseDate', title: '发布日期', align: 'right', formatter: function (value, row, index) { return jsonDateFormat(value); } },
   { field: 'StatusString', title: '状态', width: 100, align: 'right' }
  ]],
  toolbar: '#toolbar',
  idField: 'ModelID',
  onDblClickRow: function (rowIndex, rowData) { window.parent.addTab("修改文章", "@Url.Action("Edit","Article")/" + rowData.ModelID, "icon-page"); }
 });
 //查找
 $("#btn_search").click(function () {
  $("#article_list").datagrid('load', {
   title: $("#textbox_title").val(),
   input: $("#textbox_inputer").val(),
   category: $("#combo_category").combotree('getValue'),
   fromDate: $("#datebox_fromdate").datebox('getValue'),
   toDate: $("#datebox_todate").datebox('getValue')
  });
 });

 //修改事件
 function eidt() {
  var rows = $("#article_list").datagrid("getSelections");
  if (!rows || rows.length < 1) {
   $.messager.alert("提示", "请选择要修改的行!");
   return;
  }
  else if (rows.length != 1) {
   $.messager.alert("提示", "仅能选择一行!");
   return;
  }
  else {
   window.parent.addTab("修改文章", "@Url.Action("Edit","Article")/" + rows[0].ModelID, "icon-page");
  }
 }
 //删除
 function del()
 {
  var rows = $("#article_list").datagrid("getSelections");
  if (!rows || rows.length < 1) {
   $.messager.alert("提示", "未选择任何行!");
   return;
  }
  else if (rows.length > 0) {
   $.messager.confirm("确认", "您确定要删除所选行吗?", function (r) {
    if (r) {
     $.messager.progress();
     $.each(rows, function (index, value) {
      $.ajax({
       type: "post",
       url: "@Url.Action("Delete", "Article")",
       data: { id: value.ModelID },
       async: false,
       success: function (data) {
       }
      });
     });
     $.messager.progress('close');
     //清除选择行
     rows.length = 0;
     $("#article_list").datagrid('reload');
    }
   });
   return;
  }
 }
</script>
增加了修改方法、删除方法,在datagrid里添加行双击进入修改视图的方法
onDblClickRow: function (rowIndex, rowData) { window.parent.addTab("修改文章", "@Url.Action("Edit","Article")/" + rowData.ModelID, "icon-page"); }
2、

四、我的文章列表
我的文章列表与全部文章类似,并简化掉了部分内容那个,更加简单,直接上代码了
Article控制器中添加
/// <summary>
  /// 文章列表Json【注意权限问题,普通人员是否可以访问?】
  /// </summary>
  /// <param name="title">标题</param>
  /// <param name="input">录入</param>
  /// <param name="category">栏目</param>
  /// <param name="fromDate">日期起</param>
  /// <param name="toDate">日期止</param>
  /// <param name="pageIndex">页码</param>
  /// <param name="pageSize">每页记录</param>
  /// <returns></returns>
  public ActionResult JsonList(string title, string input, Nullable<int> category, Nullable<DateTime> fromDate, Nullable<DateTime> toDate, int pageIndex = 1, int pageSize = 20)
  {
   if (category == null) category = 0;
   int _total;
   var _rows = commonModelService.FindPageList(out _total, pageIndex, pageSize, "Article", title, (int)category, input, fromDate, toDate, 0).Select(
    cm => new Ninesky.Web.Models.CommonModelViewModel()
    {
     CategoryID = cm.CategoryID,
     CategoryName = cm.Category.Name,
     DefaultPicUrl = cm.DefaultPicUrl,
     Hits = cm.Hits,
     Inputer = cm.Inputer,
     Model = cm.Model,
     ModelID = cm.ModelID,
     ReleaseDate = cm.ReleaseDate,
     Status = cm.Status,
     Title = cm.Title
    });
   return Json(new { total = _total, rows = _rows.ToList() });
  }

  public ActionResult MyList()
  {
   return View();
  }

  /// <summary>
  /// 我的文章列表
  /// </summary>
  /// <param name="title"></param>
  /// <param name="fromDate"></param>
  /// <param name="toDate"></param>
  /// <param name="pageIndex"></param>
  /// <param name="pageSize"></param>
  /// <returns></returns>
  public ActionResult MyJsonList(string title, Nullable<DateTime> fromDate, Nullable<DateTime> toDate, int pageIndex = 1, int pageSize = 20)
  {
   int _total;
   var _rows = commonModelService.FindPageList(out _total, pageIndex, pageSize, "Article", title, 0, string.Empty, fromDate, toDate, 0).Select(
    cm => new Ninesky.Web.Models.CommonModelViewModel()
    {
     CategoryID = cm.CategoryID,
     CategoryName = cm.Category.Name,
     DefaultPicUrl = cm.DefaultPicUrl,
     Hits = cm.Hits,
     Inputer = cm.Inputer,
     Model = cm.Model,
     ModelID = cm.ModelID,
     ReleaseDate = cm.ReleaseDate,
     Status = cm.Status,
     Title = cm.Title
    });
   return Json(new { total = _total, rows = _rows.ToList() }, JsonRequestBehavior.AllowGet);
  }
为MyList右键添加视图
<div id="toolbar">
 <div>
  <a href="#" class="easyui-linkbutton" data-options="iconCls:'icon-edit',plain:true" onclick="eidt()">修改</a>
  <a href="#" class="easyui-linkbutton" data-options="iconCls:'icon-remove',plain:true" onclick="del()">删除</a>
  <a href="#" class="easyui-linkbutton" data-options="iconCls:'icon-reload',plain:true" onclick="$('#article_list').datagrid('reload');">刷新</a>
 </div>
 <div class="form-inline">
  <label>标题</label> <input id="textbox_title" class="input-easyui" style="width:280px" />
  <label>添加日期</label>
  <input id="datebox_fromdate" type="datetime" class="easyui-datebox" style="width:120px" /> -
  <input id="datebox_todate" type="datetime" class="easyui-datebox" style="width:120px; " />
  <a href="#" id="btn_search" data-options="iconCls:'icon-search'" class="easyui-linkbutton">查询</a>
 </div>

</div>
<table id="article_list"></table>
<script src="~/Scripts/Common.js"></script>
<script type="text/javascript">
 $("#article_list").datagrid({
  loadMsg: '加载中……',
  pagination:true,
  url: '@Url.Action("MyJsonList", "Article")',
  columns: [[
   { field: 'ModelID', title: 'ID', checkbox: true },
   { field: 'CategoryName', title: '栏目'},
   { field: 'Title', title: '标题'},
   { field: 'Inputer', title: '录入', align: 'right' },
   { field: 'Hits', title: '点击', align: 'right' },
   { field: 'ReleaseDate', title: '发布日期', align: 'right', formatter: function (value, row, index) { return jsonDateFormat(value); } },
   { field: 'StatusString', title: '状态', width: 100, align: 'right' }
  ]],
  toolbar: '#toolbar',
  idField: 'ModelID',
  onDblClickRow: function (rowIndex, rowData) { window.parent.addTab("修改文章", "@Url.Action("Edit","Article")/" + rowData.ModelID, "icon-page"); }
 });
 //查找
 $("#btn_search").click(function () {
  $("#article_list").datagrid('load', {
   title: $("#textbox_title").val(),
   fromDate: $("#datebox_fromdate").datebox('getValue'),
   toDate: $("#datebox_todate").datebox('getValue')
  });
 });

 //修改事件
 function eidt() {
  var rows = $("#article_list").datagrid("getSelections");
  if (!rows || rows.length < 1) {
   $.messager.alert("提示", "请选择要修改的行!");
   return;
  }
  else if (rows.length != 1) {
   $.messager.alert("提示", "仅能选择一行!");
   return;
  }
  else {
   window.parent.addTab("修改文章", "@Url.Action("Edit","Article")/" + rows[0].ModelID, "icon-page");
  }
 }
 //删除
 function del()
 {
  var rows = $("#article_list").datagrid("getSelections");
  if (!rows || rows.length < 1) {
   $.messager.alert("提示", "未选择任何行!");
   return;
  }
  else if (rows.length > 0) {
   $.messager.confirm("确认", "您确定要删除所选行吗?", function (r) {
    if (r) {
     $.messager.progress();
     $.each(rows, function (index, value) {
      $.ajax({
       type: "post",
       url: "@Url.Action("Delete", "Article")",
       data: { id: value.ModelID },
       async: false,
       success: function (data) {
       }
      });
     });
     $.messager.progress('close');
     //清除选择行
     rows.length = 0;
     $("#article_list").datagrid('reload');
    }
   });
   return;
  }
 }
</script>
要注意的是删除文章时删除的次序,修改文章时TryUpdateModel的使用,希望本文对大家的学习有所帮助。