bootstrap3 dialog 更强大、更灵活的模态框
发布于 2017-06-11 04:34:04 | 185 次阅读 | 评论: 0 | 来源: 网友投递
这里有新鲜出炉的Bootstrap v3教程,程序狗速度看过来!
Bootstrap Web前端CSS框架
Bootstrap是Twitter推出的一个开源的用于前端开发的工具包。它由Twitter的设计师Mark Otto和Jacob Thornton合作开发,是一个CSS/HTML框架。Bootstrap提供了优雅的HTML和CSS规范,它即是由动态CSS语言Less写成。Bootstrap一经推出后颇受欢迎,一直是GitHub上的热门开源项目,包括NASA的MSNBC(微软全国广播公司)的Breaking News都使用了该项目。
这篇文章主要介绍了bootstrap3 dialog 更强大、更灵活的模态框,本文通过效果展示实例代码详解,需要的朋友可以参考下
用过bootstrap框架的同学们都知道,bootstrap自带的模态框用起来很不灵活,可谓鸡肋的很。但nakupanda开源作者封装了一个更强大、更灵活的模态框——bootstrap3-dialog。
一、源码下载
二、效果展示
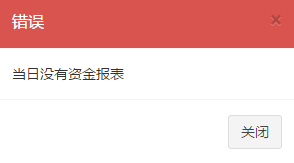
1.error警告框
2.confirm确认选择框

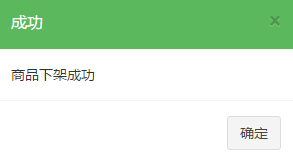
3.Success提示框
4.ajax加载远程页面弹出框

5.ajax加载自定义页面弹出框

三、使用方法
bootstrap3-dialog的demo中已有很详细的介绍,但对于初学者来说是个麻烦,还要一个一个方法和注释去看。但我对这些常用的方法进行了新的封装,所以就简便了很多。
引入js和css文件我就不多说了,直接说使用方法。
①、error警告框
//弹出错误提示的登录框
$.showErr = function(str, func) {
 // 调用show方法
 BootstrapDialog.show({
  type : BootstrapDialog.TYPE_DANGER,
  title : '错误 ',
  message : str,
  size : BootstrapDialog.SIZE_SMALL,//size为小,默认的对话框比较宽
  buttons : [ {// 设置关闭按钮
   label : '关闭',
   action : function(dialogItself) {
    dialogItself.close();
   }
  } ],
  // 对话框关闭时带入callback方法
  onhide : func
 });
};
这样封装后,需要弹出error警告框的时候直接使用$.showErr("当日没有资金日报")即可。
②、confirm确认选择框
$.showConfirm = function(str, funcok, funcclose) {
 BootstrapDialog.confirm({
  title : '确认',
  message : str,
  type : BootstrapDialog.TYPE_WARNING, // <-- Default value is
  // BootstrapDialog.TYPE_PRIMARY
  closable : true, // <-- Default value is false,点击对话框以外的页面内容可关闭
  draggable : true, // <-- Default value is false,可拖拽
  btnCancelLabel : '取消', // <-- Default value is 'Cancel',
  btnOKLabel : '确定', // <-- Default value is 'OK',
  btnOKClass : 'btn-warning', // <-- If you didn't specify it, dialog type
  size : BootstrapDialog.SIZE_SMALL,
  // 对话框关闭的时候执行方法
  onhide : funcclose,
  callback : function(result) {
   // 点击确定按钮时,result为true
   if (result) {
    // 执行方法
    funcok.call();
   }
  }
 });
};
通过$.showConfirm(title, _doPost);进行调用。
③、Success提示框
$.showSuccessTimeout = function(str, func) {
 BootstrapDialog.show({
  type : BootstrapDialog.TYPE_SUCCESS,
  title : '成功 ',
  message : str,
  size : BootstrapDialog.SIZE_SMALL,
  buttons : [ {
   label : '确定',
   action : function(dialogItself) {
    dialogItself.close();
   }
  } ],
  // 指定时间内可自动关闭
  onshown : function(dialogRef) {
   setTimeout(function() {
    dialogRef.close();
   }, YUNM._set.timeout);
  },
  onhide : func
 });
};
④、ajax加载远程页面弹出框
首先,我们先来看如何使用。
<a href="${ctx}/common/showSendMessage" rel="external nofollow" rel="external nofollow" target="dialog">点击打开</a>对,就这一行代码即可!
- 一个a标签
- 一个href属性指向远程页面
- target属性设置为dialog
不过,我们需要做一下封装。
第一步,页面加载时,我们需要让a标签执行ajaxTodialog方法。
$(function() {
 // dialogs
 if ($.fn.ajaxTodialog) {
  $("a[target=dialog]").ajaxTodialog();
 }
});
第二步,封装ajaxTodialog方法。
$.fn.extend({
 ajaxTodialog : function() {
  return this.click(function(event) {
   var $this = $(this);
   YUNM.debug("ajaxTodialog" + $this.selector);
   var title = $this.attr("title") || $this.text();
   var url=$this.attr("href");
   $.ajax({
    type : 'POST',
    url : url,
    cache : false,
    success : function(response) {
     ajaxDialog = BootstrapDialog.show({
      message : function(dialog) {
       var $message = $('<div></div>');
       $message.html(response);// 把传回来的页面作为message返回
       return $message;
      },
      title : title,
    }
   });
   event.preventDefault();
   return false;
  });
 },
});
⑤、ajax加载自定义页面弹出框
⑤和④类似,不过有些区别,下面只把区别列出来。
使用方法上,需要加上manipulating=”1”,指明为自定义页面,不使用bootstrap dialog的header、footer。
<a href="${ctx}/common/showSendMessage" rel="external nofollow" rel="external nofollow" target="dialog" manipulating="1">自定义页面</a>ajaxTodialog方法中增加对manipulating=1的处理。
if (manipulating == 1) {
 ajaxDialog = new BootstrapDialog({
  message : function(dialog) {
   var $message = $('<div></div>');
   $message.html(response);

   return $message;
  },
  // 找到自定义页面上x号进行绑定close事件
  onshown : function(dialogRef) {
   var $button = dialogRef.getModalContent().find('button[data-widget="remove"]');
   $button.on('click', {
    dialogRef : dialogRef
   }, function(event) {
    event.data.dialogRef.close();
   });
  },
 });
 ajaxDialog.realize();
 ajaxDialog.getModalHeader().hide();// header不要
 ajaxDialog.getModalFooter().hide();// footer也不要
 ajaxDialog.getModalBody().css('padding', 0);// 无填充
 ajaxDialog.open();
}
以上所述是小编给大家介绍的bootstrap3 dialog 更强大、更灵活的模态框,希望对大家有所帮助,如果大家有任何疑问请给我留言,小编会及时回复大家的。在此也非常感谢大家对phperz网站的支持!