Spring Boot的properties配置文件读取
发布于 2017-09-06 00:14:05 | 187 次阅读 | 评论: 0 | 来源: 网友投递
Spring Boot
Spring Boot 项目旨在简化创建产品级的 Spring 应用和服务。你可通过它来选择不同的 Spring 平台。可创建独立的 Java 应用和 Web 应用,同时提供了命令行工具来允许 'spring scripts'.
这篇文章主要介绍了Spring Boot的properties配置文件读取,小编觉得挺不错的,现在分享给大家,也给大家做个参考。一起跟随小编过来看看吧
我在自己写点东西玩的时候需要读配置文件,又不想引包,于是打算扣点Spring Boot读取配置文件的代码出来,当然只是读配置文件没必要这么麻烦,不过反正闲着也是闲着,扣着玩了。
具体启动过程以前的博客写过Spring Boot启动过程(一),这次入口在SpringApplication类中:
  private ConfigurableEnvironment prepareEnvironment(
      SpringApplicationRunListeners listeners,
      ApplicationArguments applicationArguments) {
    // Create and configure the environment
    ConfigurableEnvironment environment = getOrCreateEnvironment();
    configureEnvironment(environment, applicationArguments.getSourceArgs());

    //此处读取
    listeners.environmentPrepared(environment);

    if (isWebEnvironment(environment)
        && this.webApplicationType == WebApplicationType.NONE) {
      environment = convertToStandardEnvironment(environment);
    }
    return environment;
  }
关于监听器的过程在开头说的那篇的一系列中也说的挺细的,这里不介绍了:
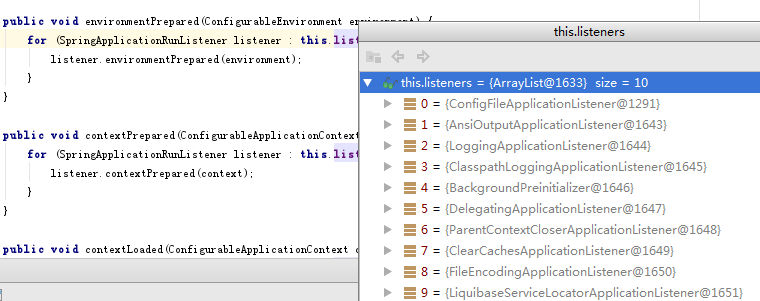
都是监听器相关的部分,略了,SpringApplicationRunListeners类中:
  public void environmentPrepared(ConfigurableEnvironment environment) {
    for (SpringApplicationRunListener listener : this.listeners) {
      listener.environmentPrepared(environment);
    }
  }
EventPublishingRunListener:
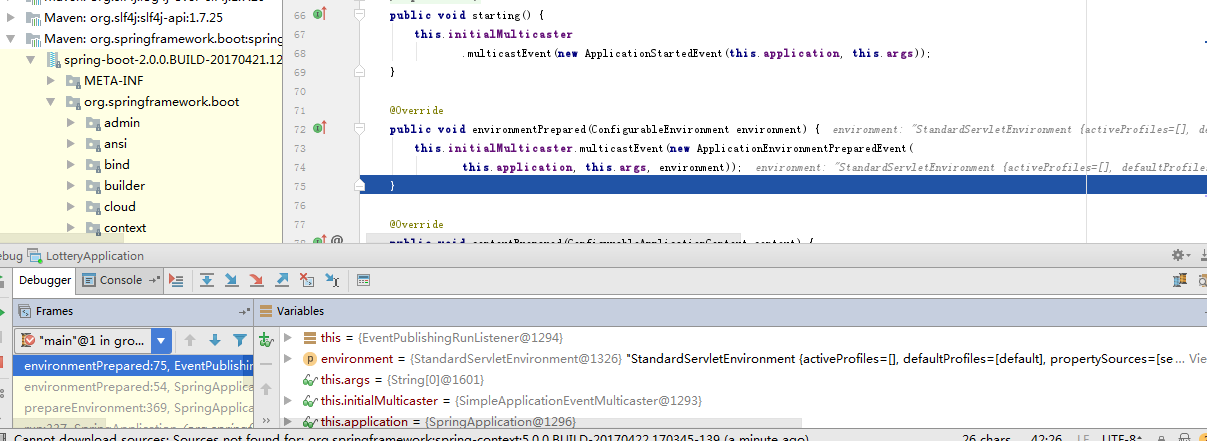
onApplicationEnvironmentPreparedEvent事件触发org\springframework\boot\spring-boot\2.0.0.BUILD-SNAPSHOT\spring-boot-2.0.0.BUILD-20170421.122111-547-sources.jar!\org\springframework\boot\context\config\ConfigFileApplicationListener.java监听器执行:
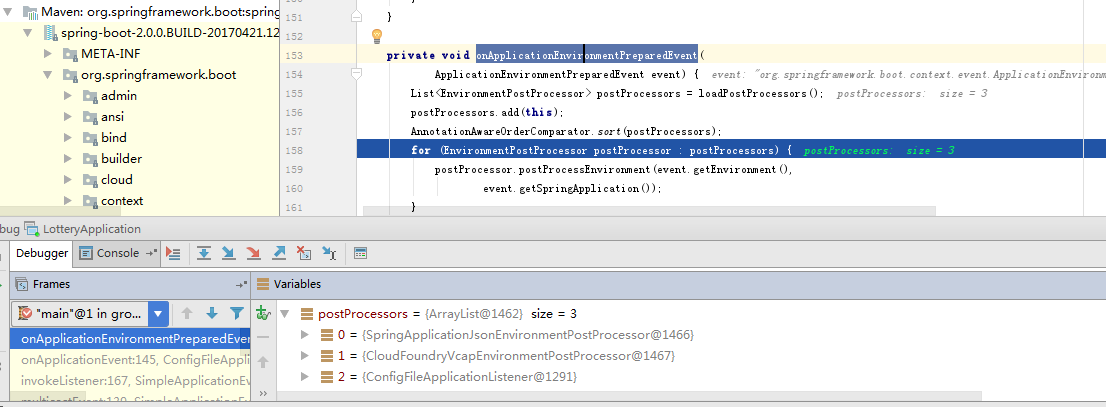
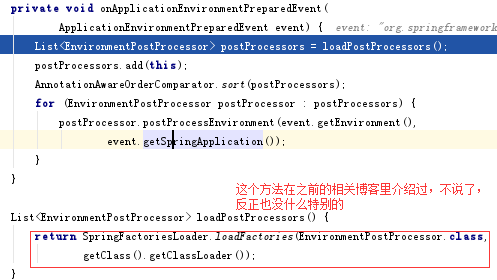
现在这个postProcessors中包含Json之类其他的监听器,不过我现在只想扣出properties的代码,别的先略过,反正其实也没什么,本来也是想看看它的思路,扣着玩,不要太在意。

  protected void addPropertySources(ConfigurableEnvironment environment,
      ResourceLoader resourceLoader) {
    RandomValuePropertySource.addToEnvironment(environment);
    new Loader(environment, resourceLoader).load();
  }
    Loader(ConfigurableEnvironment environment, ResourceLoader resourceLoader) {
      this.environment = environment;
      this.resourceLoader = resourceLoader == null ? new DefaultResourceLoader()
          : resourceLoader;
    }
    this.classLoader = ClassUtils.getDefaultClassLoader();
    //其实也就是Thread.currentThread().getContextClassLoader();
下面就是真正加载了配置文件的load方法了,先是初始化PropertySourcesLoader和一些临时的集合:
      this.propertiesLoader = new PropertySourcesLoader();
      this.activatedProfiles = false;
      this.profiles = Collections.asLifoQueue(new LinkedList<Profile>());
      this.processedProfiles = new LinkedList<>();

      // Pre-existing active profiles set via Environment.setActiveProfiles()
      // are additional profiles and config files are allowed to add more if
      // they want to, so don't call addActiveProfiles() here.
      Set<Profile> initialActiveProfiles = initializeActiveProfiles();
      this.profiles.addAll(getUnprocessedActiveProfiles(initialActiveProfiles));
这些集合其实如果没配置Profile基本是没用的,这东西现在已经很少用到了,这个环境当然是没配的:

主要是下面这部分:
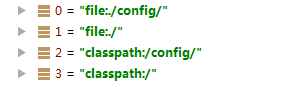
for (String location : getSearchLocations()) {
if (!location.endsWith("/")) {
// location is a filename already, so don't search for more
// filenames
load(location, null, profile);
}
else {
for (String name : getSearchNames()) {
load(location, name, profile);
}
}
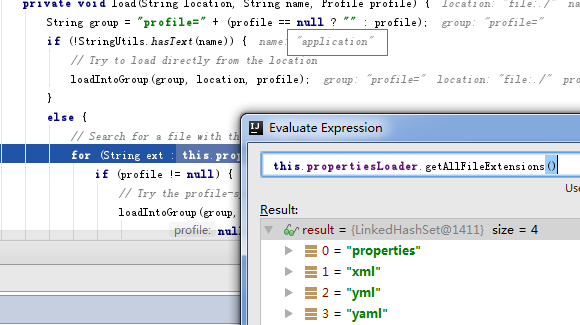
}就是去指定目录下去找各种以application为名字的指定类型的配置文件:
我只关心application.properties,它是上面循环中的一次,走进了doLoadIntoGroup方法的下面那句:


  private Map<String, ?> loadProperties(Resource resource) throws IOException {
    String filename = resource.getFilename();
    if (filename != null && filename.endsWith(XML_FILE_EXTENSION)) {
      return (Map) PropertiesLoaderUtils.loadProperties(resource);
    }
    return new OriginTrackedPropertiesLoader(resource).load();
  }
这个resource其实只是封装了一下InputStream,具体的读取。。。反正也没啥特别的读法:
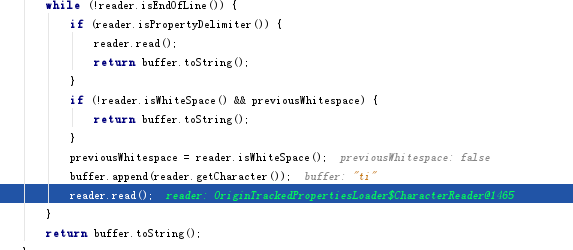
读出的key和value放在Map<String, OriginTrackedValue>:
  private void put(Map<String, OriginTrackedValue> result, String key,
      OriginTrackedValue value) {
    if (!key.isEmpty()) {
      result.put(key, value);
    }
  }
以上就是本文的全部内容,希望对大家的学习有所帮助,也希望大家多多支持PHPERZ。