node文字生成图片的示例代码
发布于 2017-11-06 12:24:51 | 308 次阅读 | 评论: 0 | 来源: 网友投递
Node.js 服务器端的JavaScript
Node.js 是一个基于Chrome JavaScript 运行时建立的一个平台, 用来方便地搭建快速的 易于扩展的网络应用· Node.js 借助事件驱动, 非阻塞I/O 模型变得轻量和高效, 非常适合 运行在分布式设备 的 数据密集型 的实时应用
本篇文章主要介绍了node文字转图片的示例代码,小编觉得挺不错的,现在分享给大家,也给大家做个参考。一起跟随小编过来看看吧
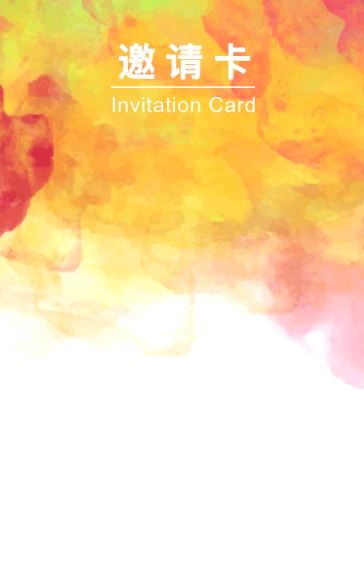
今天老板提了需求,要在服务端生成邀请卡,嗯…,简单的说就是把要这张:

变成差多这样的:

后端搞ruby的哥们搞了个html转图片,说转得太慢了,我就把这坑接下来了
所以睡前就倒腾了下,搞了个简单的实现
解决思路
文字转svg -> svg转png -> 合并图片
相关轮子
- images Node.js 轻量级跨平台图像编解码库,不需要额外安装依赖
- text-to-svg 文字转svg
- svg2png svg转png图片
示例代码
'use strict';

const fs = require('fs');
const images = require('images');
const TextToSVG = require('text-to-svg');
const svg2png = require("svg2png");
const Promise = require('bluebird');

Promise.promisifyAll(fs);

const textToSVG = TextToSVG.loadSync('fonts/文泉驿微米黑.ttf');

const sourceImg = images('./i/webwxgetmsgimg.jpg');
const sWidth = sourceImg.width();
const sHeight = sourceImg.height();

const svg1 = textToSVG.getSVG('魏长青-人人讲App', {
 x: 0,
 y: 0,
 fontSize: 24,
 anchor: 'top',
});

const svg2 = textToSVG.getSVG('邀请您参加', {
 x: 0,
 y: 0,
 fontSize: 16,
 anchor: 'top',
});

const svg3 = textToSVG.getSVG('人人讲课程', {
 x: 0,
 y: 0,
 fontSize: 32,
 anchor: 'top',
});

Promise.coroutine(function* generateInvitationCard() {
 const targetImg1Path = './i/1.png';
 const targetImg2Path = './i/2.png';
 const targetImg3Path = './i/3.png';
 const targetImg4Path = './i/qrcode.jpg';
 const [buffer1, buffer2, buffer3] = yield Promise.all([
  svg2png(svg1),
  svg2png(svg2),
 svg2png(svg3),
 ]);

 yield Promise.all([
  fs.writeFileAsync(targetImg1Path, buffer1),
  fs.writeFileAsync(targetImg2Path, buffer2),
  fs.writeFileAsync(targetImg3Path, buffer3),
 ]);

 const target1Img = images(targetImg1Path);
 const t1Width = target1Img.width();
 const t1Height = target1Img.height();
 const offsetX1 = (sWidth - t1Width) / 2;
 const offsetY1 = 200;

 const target2Img = images(targetImg2Path);
 const t2Width = target2Img.width();
 const t2Height = target2Img.height();
 const offsetX2 = (sWidth - t2Width) / 2;
 const offsetY2 = 240;

 const target3Img = images(targetImg3Path);
 const t3Width = target3Img.width();
 const t3Height = target3Img.height();
 const offsetX3 = (sWidth - t3Width) / 2;
 const offsetY3 = 270;

 const target4Img = images(targetImg4Path);
 const t4Width = target4Img.width();
 const t4Height = target4Img.height();
 const offsetX4 = (sWidth - t4Width) / 2;
 const offsetY4 = 400;

 images(sourceImg)
 .draw(target1Img, offsetX1, offsetY1)
 .draw(target2Img, offsetX2, offsetY2)
 .draw(target3Img, offsetX3, offsetY3)
 .draw(target4Img, offsetX4, offsetY4)
 .save('./i/card.png', { quality : 90 });
})().catch(e => console.error(e));
注意事项
text-to-svg需要中文字体的支持,不然中文会乱码
在我的破电脑上执行一次只花了500多毫秒,感觉足够了,分享出来希望能给大家一个参照
以上就是本文的全部内容,希望对大家的学习有所帮助,也希望大家多多支持phperz。
推荐阅读
最新资讯