asp.net core新特性之TagHelper标签助手
发布于 2017-11-08 12:41:48 | 68 次阅读 | 评论: 0 | 来源: 网友投递
ASP.NET
ASP.NET 是.NET FrameWork的一部分,是一项微软公司的技术,是一种使嵌入网页中的脚本可由因特网服务器执行的服务器端脚本技术,它可以在通过HTTP请求文档时再在Web服务器上动态创建它们。 指 Active Server Pages(动态服务器页面) ,运行于 IIS(Internet Information Server 服务,是Windows开发的Web服务器)之中的程序 。
这篇文章主要为大家详细介绍了asp.net core新特性之TagHelper标签助手的相关资料,具有一定的参考价值,感兴趣的小伙伴们可以参考一下
今天开始,我就来说说asp.net core的新特性,今天就说说TagHelper标签助手。虽然学习.net,最有帮助的就是microsoft的官方说明文档了,里面把一些使用说明都写的非常清楚,但奈何.net core放入文档微软还没来得及翻译,对于英文不好的人来说简直就是看的艰辛。所以今天就来学习学习这标签助手,和博客园大佬分享分享经验。
想看Microsoft官方文档和Git项目的可以直接点击以下传送门~~
说起TagHelper给我的印象,有点像asp.net form当中的服务器端控件,又有点像Angular或者Vue当中的“组件”的后端实现版本。用户可以将一组html标签集合转换为一个自定义标签,实现了html代码的复用。
那么正文开始~~
首先,我们需要安装一个vs2017插件:Razor Language Services。这个插件能在html中智能提示用户自定义的标签助手。
https://marketplace.visualstudio.com/items?itemName=ms-madsk.RazorLanguageServices
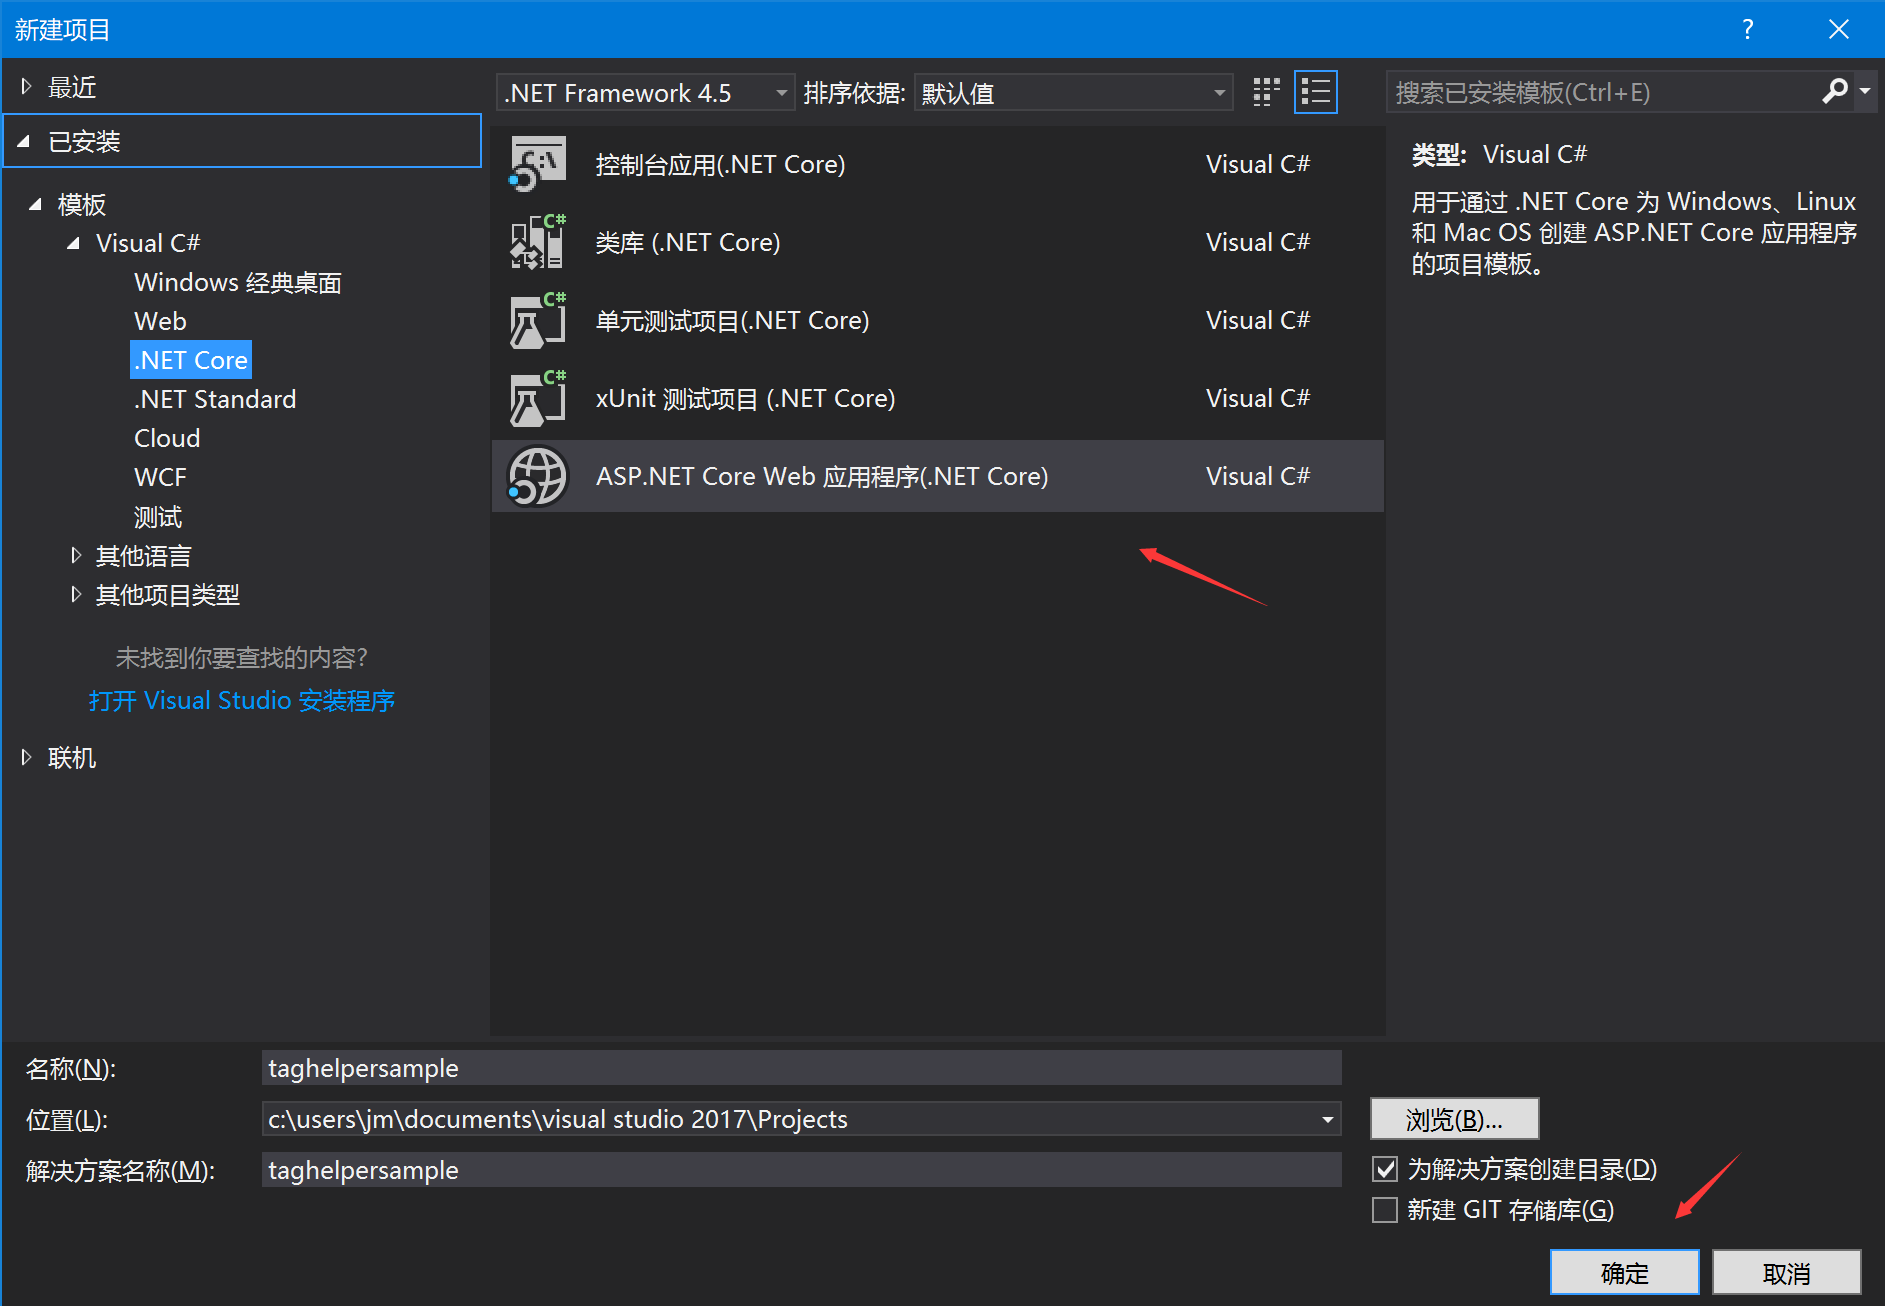
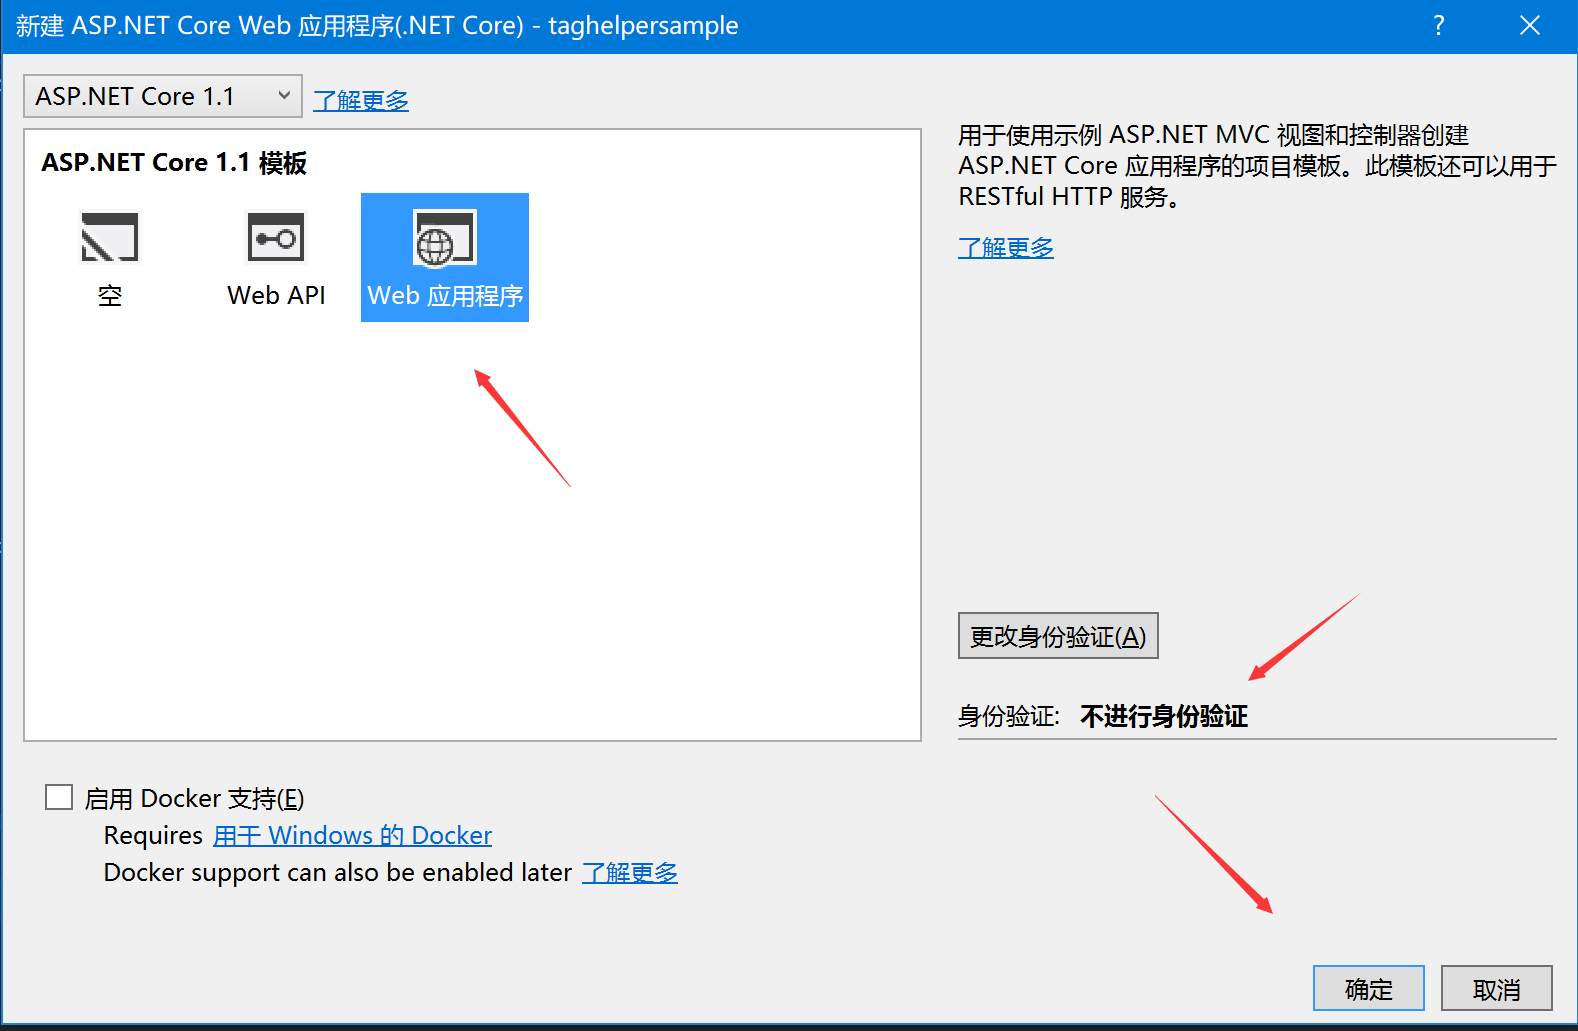
创建一个asp.net core项目
使用微软定义的标签助手,在安装了插件后,使用标签助手的标签会进行高亮显示

上图中environment、link、a标签均使用了标签助手实现各自的功能
<a asp-area="" asp-controller="Home" asp-action="Index" class="navbar-brand">taghelpersample</a>a标签中通过使用asp-controller,asp-action自定义属性来实现路由访问。
这时有人会说,我也可以使用@Html类来实现相同功能,为什么需要使用TagHelper?
@Html.ActionLink("taghelpersample", "Index", "Home",null, new { Class = "navbar-brand" })确实,使用@Html帮助类我们能实现相同的功能,但是使用标签助手的方式不是更加符合html的标签语法吗,对于强迫症程序员简直就是福音~~。而且对于标签的原有属性的添加例如class,标签助手的使用也更加方便。
<!--标签助手版form-->
<form asp-controller="Home" asp-action="Index" class="form-horizontal" method="post">

</form>
<!--Html帮助类版form-->
@using (Html.BeginForm("Index", "Home", FormMethod.Post,, new { Class = "form-horizontal" }))
{

}
此外,标签助手的另外一个特色就是可以自定义,具体步骤如下:
(1)创建派生自TagHelper类的Class
 //类会默认转换为<text-collection></text-collection>
   public class TextCollectionTagHelper:TagHelper
 {
  public override void Process(TagHelperContext context, TagHelperOutput output)
  {
   base.Process(context, output);
  }
 }
(2)设置属性与基本类
public string Color { get; set; }

  public override void Process(TagHelperContext context, TagHelperOutput output)
  {
   output.TagName = "div";
   output.Attributes.Add("style", "color:" + Color);
   var text = "Hello,World";
   var h1 = new TagBuilder("h1");
   var h2 = new TagBuilder("h2");
   var h3 = new TagBuilder("h3");
   var h4 = new TagBuilder("h4");
   var h5 = new TagBuilder("h5");
   var h6 = new TagBuilder("h6");
   h1.InnerHtml.Append(text);
   h2.InnerHtml.Append(text);
   h3.InnerHtml.Append(text);
   h4.InnerHtml.Append(text);
   h5.InnerHtml.Append(text);
   h6.InnerHtml.Append(text);
   output.Content.AppendHtml(h1);
   output.Content.AppendHtml(h2);
   output.Content.AppendHtml(h3);
   output.Content.AppendHtml(h4);
   output.Content.AppendHtml(h5);
   output.Content.AppendHtml(h6);
  }
(3)在_ViewImports.cshtml导入类命名空间
@addTagHelper *,taghelpersample(4)在cshtml中使用标签助手
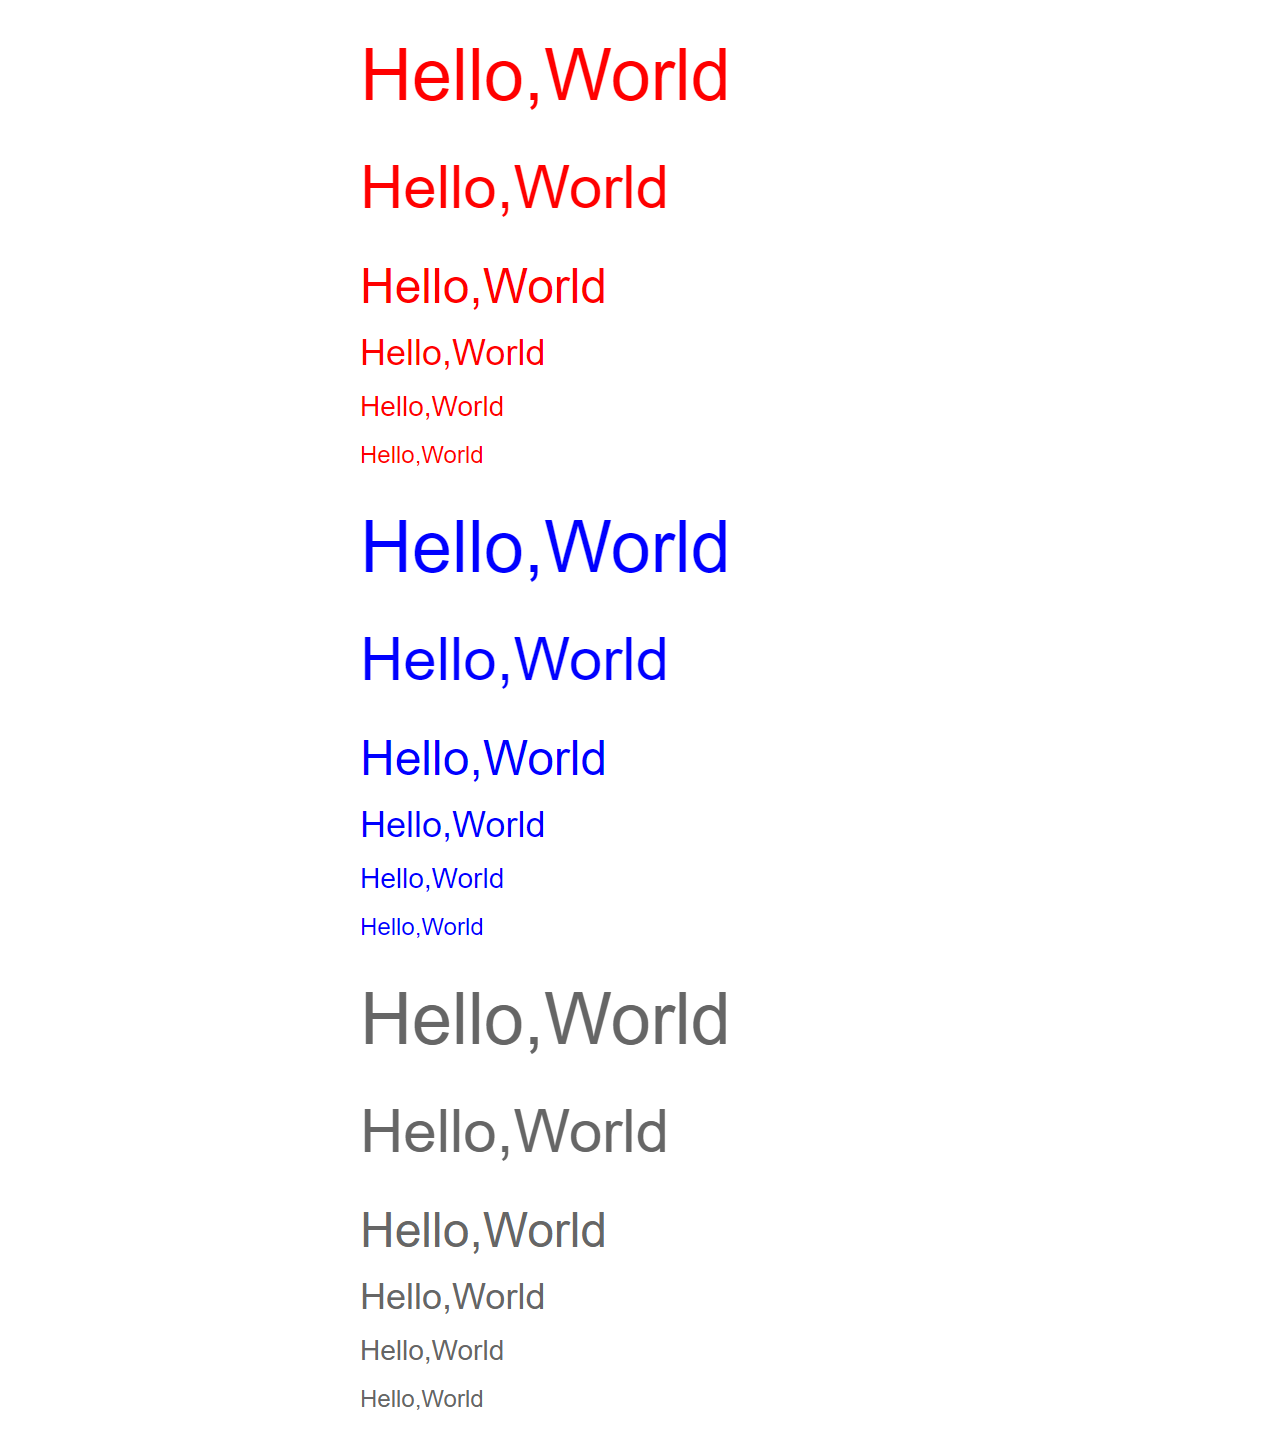
<text-collection color="red"></text-collection>
<text-collection color="blue"></text-collection>
<text-collection color="#666"></text-collection>
(5)调试效果
OK,今天关于TagHelper就分享到这。
以上就是本文的全部内容,希望对大家的学习有所帮助,也希望大家多多支持PHPERZ。