ASP.NET MVC分页和排序功能实现
发布于 2018-03-15 02:58:26 | 130 次阅读 | 评论: 0 | 来源: 网友投递
ASP.NET
ASP.NET 是.NET FrameWork的一部分,是一项微软公司的技术,是一种使嵌入网页中的脚本可由因特网服务器执行的服务器端脚本技术,它可以在通过HTTP请求文档时再在Web服务器上动态创建它们。 指 Active Server Pages(动态服务器页面) ,运行于 IIS(Internet Information Server 服务,是Windows开发的Web服务器)之中的程序 。
这篇文章主要介绍了MVC学习系列之分页和排序功能实现,具有一定的参考价值,感兴趣的小伙伴们可以参考一下
分页和排序,应该是软件开发中,需要必知必会的技能了,对于分页,网上很多教程,当然,别人终究是别人的,只有自己理解,会了,并且吸收之后,再用自己的语言,传授出来,这才是硬道理。好了,废话说多了。现在我们进入正题:
这里,我打算使用EF Code-First方式分页控件就是用PagedList.MVC,来做分页,对于排序,实现的思路是,加载数据出来之后,默认是升序排序,然后我们点击一下相应的列标题,就按照该字段降序排序,查数据。思路明确了,就开始干吧!
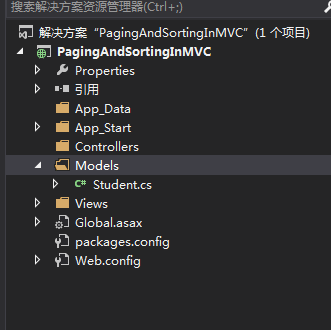
1.首先新建一个空白的MVC项目,在Model文件夹里,新建一个Student实体
Student实体中的代码:
using System;
using System.Collections.Generic;
using System.Linq;
using System.Web;

namespace PagingAndSortingInMVC.Models
{
 public class Student
 {
 public int ID { get; set; }

 public string Name { get; set; }

 public string Sex { get; set; }

 public string Email { get; set; }

 public int Age { get; set; }
 }
}
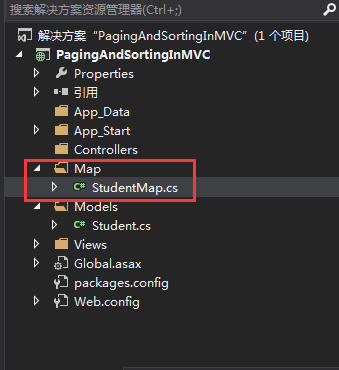
2.添加EF引用之后,我们在根目录下,在创建一个文件夹Map,在里面创建一个类StudentMap
StudentMap类的代码:
using PagingAndSortingInMVC.Models;
using System;
using System.Collections.Generic;
using System.ComponentModel.DataAnnotations.Schema;
using System.Data.Entity.ModelConfiguration;
using System.Linq;
using System.Web;

namespace PagingAndSortingInMVC.Map
{
 public class StudentMap:EntityTypeConfiguration<Student>
 {
 public StudentMap()
 {
  //配置主键
  this.HasKey(s => s.ID);

  //把ID列设置为自增列
  this.Property(s => s.ID).HasDatabaseGeneratedOption(DatabaseGeneratedOption.Identity);
  //配置列
  this.Property(s => s.Name).HasMaxLength(50).IsRequired();
  this.Property(s => s.Sex).HasMaxLength(2).IsRequired();
  this.Property(s => s.Age).IsRequired();
  this.Property(s => s.Email).HasMaxLength(100).IsRequired();
 }
 }
}
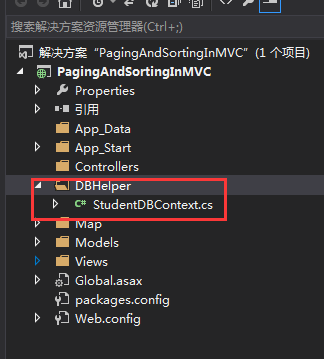
3.在根目录下,再新建一个文件夹DBHelper,在里面新建一个类StudentDBContext
StudentDBContext类的代码:
using PagingAndSortingInMVC.Map;
using System;
using System.Collections.Generic;
using System.Data.Entity;
using System.Linq;
using System.Web;

namespace PagingAndSortingInMVC.DBHelper
{
 public class StudentDBContext:DbContext
 {
 public StudentDBContext()
  : base("name=DbConnectionString")
 {

 }

 protected override void OnModelCreating(DbModelBuilder modelBuilder)
 {
  //因为这里只有一个实体,就不搞的那么复杂了,不用反射来做。直接添加单个实体的配置
  modelBuilder.Configurations.Add(new StudentMap());
  base.OnModelCreating(modelBuilder);
 }
 }
}
然后在配置文件中加上:
<connectionStrings>
<add name="DbConnectionString" connectionString="Server=.;Database=MyStudentDB;UID=sa;PWD=Password_1" providerName="System.Data.SqlClient"/>
</connectionStrings>
具体的位置在这:

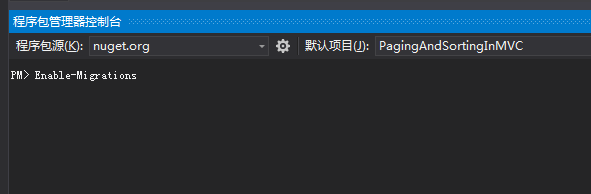
4.好了,现在实体和数据库的配置都写好了,现在我们使用数据库迁移技术【Migrations】来自动生成数据库,首先打开程序包管理控制台。
添加一行语句:Enable-Migrations,然后按回车键:
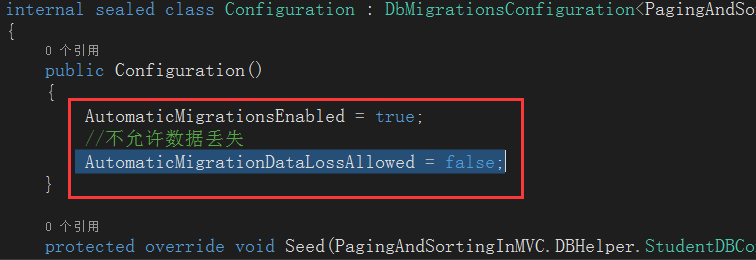
这个时候,就在我们程序中生成了一个文件夹Migrations,里面有一个类Configuration:

修改Configuration类中的代码:把 AutomaticMigrationsEnabled 设置为true;并添加一句代码,让迁移过程中,没有数据丢失:
AutomaticMigrationDataLossAllowed = false;
然后在程序包管理控制台中接着输入:
Update-Database -Verbose
注意: 【-Verbose和Database之间有空格】,之所以输入-Verbose就是可以在控制台看到生成的SQL语句:
PM> Update-Database -Verbose
Using StartUp project 'PagingAndSortingInMVC'.
Using NuGet project 'PagingAndSortingInMVC'.
Specify the '-Verbose' flag to view the SQL statements being applied to the target database.
Target database is: 'MyStudentDB' (DataSource: ., Provider: System.Data.SqlClient, Origin: Configuration).
No pending explicit migrations.
Applying automatic migration: 201607180249098_AutomaticMigration.
CREATE TABLE [dbo].[Students] (
 [ID] [int] NOT NULL IDENTITY,
 [Name] [nvarchar](50) NOT NULL,
 [Sex] [nvarchar](2) NOT NULL,
 [Email] [nvarchar](100) NOT NULL,
 [Age] [int] NOT NULL,
 CONSTRAINT [PK_dbo.Students] PRIMARY KEY ([ID])
)
CREATE TABLE [dbo].[__MigrationHistory] (
 [MigrationId] [nvarchar](150) NOT NULL,
 [ContextKey] [nvarchar](300) NOT NULL,
 [Model] [varbinary](max) NOT NULL,
 [ProductVersion] [nvarchar](32) NOT NULL,
 CONSTRAINT [PK_dbo.__MigrationHistory] PRIMARY KEY ([MigrationId], [ContextKey])
)
INSERT [dbo].[__MigrationHistory]([MigrationId], [ContextKey], [Model], [ProductVersion])
VALUES (N'201607180249098_AutomaticMigration', N'PagingAndSortingInMVC.Migrations.Configuration', 0x1F8B0800000000000400CD57DB6EDB38107D5FA0FF20F03935ED040B7403B9856327BBC6D64950A579A7A5B1422C456A492AB0BFAD0FFB49FB0B3BD4DD926F31DA451120B0A8993333673817FDFBED1FFFD33A11DE2B68C3951C93D160483C90A18AB88CC724B3ABF71FC8A78FEF7EF16FA364ED3D5772574E0E35A51993176BD36B4A4DF80209338384875A19B5B283502594458A5E0E87BFD1D188024210C4F23CFF4B262D4F207FC0C7A99221A4366362A12210A63CC737418EEADDB3044CCA4218934716A36F1319054A5BFC35978BE7E96076F307881434F1268233F42A00B1221E93525966D1E7EBAF0602AB958C83140F9878DAA480722B260C94B15C37E2A78635BC7461D146B1820A336355F246C0D155C913EDAA9FC536A97944266F9171BB7151E76C2243368B405AE2756D5D4F857672FBB82E723428F52FBC9D5217F565C13BE5FE2EBC69266CA6612C21B39A0954CC9682877FC2E649FD05722C3321DA2EA3D3F86EEB008F1EB5C23CDBCD17589581CC67C4A3DB7AB4AB58ABB5748A18E7D25E5D12EF1E8DB3A580FA46B4F808ACD2F03B48D0CC42F4C8AC058D099DBBF091D39EF58E2DF7BFB28657101922DE82AD3F838CEDCB98FC8AA574C7D7105507A5035F25C73A441DAB33D8E1E061A301AC0FD8BCFC11266F13C6C501A3A3E10F897412C3B15CB6017CDA5442BF3EB01359C631D3DB4532BB712F60BDAB5AB0B1940563CA08B6DD2D8003B0DB9086788D2345BF1AD425B9CBE1DAB5A63BD2A23D566D94EEE9A3FE82A52966A3D557CB132F289AEAF47DF0F60E93141834343B1A4DED6D6D098B88C5D0798BA6D1D33BAE8D9D31CB96CCA56B1A253DB15E22F6905C99EB70DDED220DF59582FB5D281D9E3075923A900DA9771867821279C8507BD674DC9E663EE898607A47979A2A9125725FA73BA45DF49DB67E71723A42DE44DA00F9C1E9FA654768239447A763E4E5DD46C80FFAFA3EEDD0DF4D39EDE5BC3333BA77E8500D76456AEB752D766ACE2FEFFFF105A757108508F19098571EE5C5B0311692811318047F8BA9E079D7A804164CF215185B8C5582F5FAA1B317FD3C3B0A352612A72D2AFFFB6AC01DA94787FF1BC7557B1B90AF4C872F4CF7F681F387FD4EC86333F1C82CDF89994FF3F34775CEED771CD4FD3172D2143E34848BBA1B9368A9D0EBC2CF66789F39A2FB6DC0A7EDAF217F0686C70D84FB369210BAFA6A402B99B95CA98A620CADED5125D2C9C0022C8B90A1094EB6150B2DBE0EC1987C557B6622CB53BF84682E1F329B6676620C244BB1B5E3FAF4B0FD7C0FD9F6D97F48DD93F91E21A09B1C43800779937111D57EDFEDB8427B20DC65294B1ABDC25515E1E24D8D74AFE48940257D334841BA7BF104492A10CC3CC880BDC239BEE13AF91962166EAA6EBE1FE47822B669F7679CC59A25A6C468F4DD173E759FF81FFF0366E046F514100000 , N'6.1.3-40302')

Running Seed method.
PM>
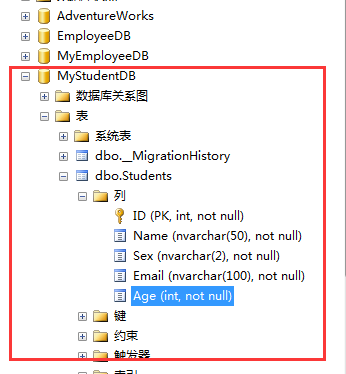
打开数据库,我们看到,就生成我们想要的数据库和表了:
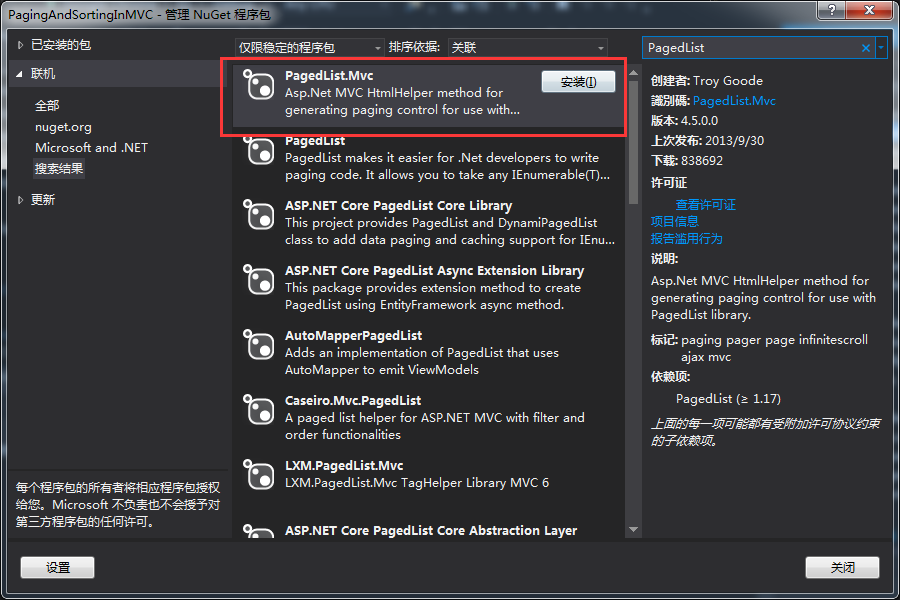
既然要分页,就开始引入分页控件吧,引入PagedList.MVC
5.新建一个空白模板的Student控制器。
控制器里面就是我们主要的逻辑代码了:
using PagingAndSortingInMVC.DBHelper;
using System;
using System.Collections.Generic;
using System.Linq;
using System.Web;
using System.Web.Mvc;
using PagedList;
using PagingAndSortingInMVC.Models;

namespace PagingAndSortingInMVC.Controllers
{
 public class StudentController : Controller
 {
 private StudentDBContext db=null;
 public StudentController()
 {
  db = new StudentDBContext();
 }

 /// <summary>
 /// 首页【查询分页数据】
 /// </summary>
 /// <param name="sortBy">根据什么排序</param>
 /// <param name="currentSort">当前排序字段</param>
 /// <param name="page">当前页</param>
 /// <returns></returns>
 public ActionResult Index(string sortBy,string currentSort,int? page)
 {
  int pageIndex = 1;
  int pageSize = 5;
  //判断page是否有值,有的话就给值,没有就赋值1
  pageIndex = page.HasValue ? Convert.ToInt32(page) : 1;
  ViewBag.CurrentSort = sortBy;
//这句必须要,否则刚开始是空的,报错,就不能循环了。
sortBy = string.IsNullOrEmpty(sortBy) ? "Name" : sortBy; //如果sortBy为空,就设置为Name,下面设置的时候,默认按照名称排序

  IPagedList<Student> lstStudent = null;
  switch (sortBy)
  {
  case "Name":
   //如果sortBy==currentSort,就按照对应字段降序排列,并分页。否则升序。
   if (sortBy.Equals(currentSort))
   {
   lstStudent = db.Set<Student>().
    OrderByDescending(s => s.Name).
    ToPagedList(pageIndex, pageSize);    //根据一热心博友的建议,加上了这句,点击相应的列,升序降序循环。                 ViewBag.CurrentSort = null;
   }
   else
   {
   lstStudent = db.Set<Student>().
    OrderBy(s => s.Name).
    ToPagedList(pageIndex, pageSize);
   }
   break;

  case "Sex":
   //如果sortBy==currentSort,就按照对应字段降序排列,并分页。否则升序。
   if (sortBy.Equals(currentSort))
   {
   lstStudent = db.Set<Student>().
    OrderByDescending(s => s.Sex).
    ToPagedList(pageIndex, pageSize); //根据一热心博友的建议,加上了这句,点击相应的列,升序降序循环。                 ViewBag.CurrentSort = null;
   }
   else
   {
   lstStudent = db.Set<Student>().
    OrderBy(s => s.Sex).
    ToPagedList(pageIndex, pageSize);
   }
   break;

  case "Email":
   //如果sortBy==currentSort,就按照对应字段降序排列,并分页。否则升序。
   if (sortBy.Equals(currentSort))
   {
   lstStudent = db.Set<Student>().
    OrderByDescending(s => s.Email).
    ToPagedList(pageIndex, pageSize); //根据一热心博友的建议,加上了这句,点击相应的列,升序降序循环。                 ViewBag.CurrentSort = null;
   }
   else
   {
   lstStudent = db.Set<Student>().
    OrderBy(s => s.Email).
    ToPagedList(pageIndex, pageSize);
   }
   break;

  case "Age":
   //如果sortBy==currentSort,就按照对应字段降序排列,并分页。否则升序。
   if (sortBy.Equals(currentSort))
   {
   lstStudent = db.Set<Student>().
    OrderByDescending(s => s.Age).
    ToPagedList(pageIndex, pageSize); //根据一热心博友的建议,加上了这句,点击相应的列,升序降序循环。                 ViewBag.CurrentSort = null;
   }
   else
   {
   lstStudent = db.Set<Student>().
    OrderBy(s => s.Age).
    ToPagedList(pageIndex, pageSize);
   }
   break;

  default:
   //如果sortBy==currentSort,就按照对应字段降序排列,并分页。否则升序。
   if (sortBy.Equals(currentSort))
   {
   lstStudent = db.Set<Student>().
    OrderByDescending(s => s.Name).
    ToPagedList(pageIndex, pageSize); //根据一热心博友的建议,加上了这句,点击相应的列,升序降序循环。                 ViewBag.CurrentSort = null;
   }
   else
   {
   lstStudent = db.Set<Student>().
    OrderBy(s => s.Name).
    ToPagedList(pageIndex, pageSize);
   }

   break;
  }
  return View(lstStudent);
 }

 public ActionResult AddStudent()
 {
  return View();
 }

 [HttpPost]
 [ValidateAntiForgeryToken]
 public ActionResult AddStudent(Student model)
 {
  db.Set<Student>().Add(model);
  db.SaveChanges();
  return RedirectToAction("Index");
 }
 }
}
创建相对应的Index视图和AddStudent视图:
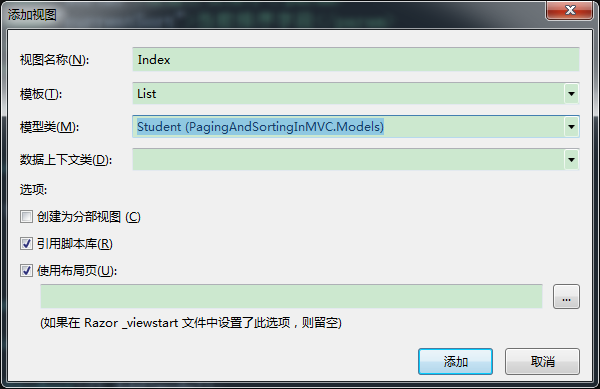
Index视图:
@using PagedList.Mvc;@*//引入分页的组件*@
@model PagedList.IPagedList<PagingAndSortingInMVC.Models.Student>

@{
 ViewBag.Title = "Index";
}
<style>
 table {
 width: 100%;
 }

 table tr td {
  border: 2px solid black;
  text-align: center;
  word-wrap: break-word;
 }

 table tr:hover {
  background-color: #000;
  color: #fff;
 }

 table tr th {
  border: 2px solid black;
  text-align: center;
  background-color: #fff;
  color: #000;
 }
</style>

<h2>Index</h2>

<p>
 @Html.ActionLink("Create New", "Create")
</p>
@using(Html.BeginForm("Index","Employee",FormMethod.Get))
{
<table class="table">
 <tr>
 <th>
  @* 通过创建匿名对象,传递参数到控制器中,new { sortBy = "Name", currentSort = ViewBag.CurrentSort }*@
  @*参数的大小写无所谓,只要和控制器名称一样就行,sortBy,currentSort*@
  @Html.ActionLink("Name", "Index", new { sortBy = "Name", currentSort = ViewBag.CurrentSort })
 </th>
 <th>
  @Html.ActionLink("Sex", "Index", new { sortBy = "Sex", currentSort = ViewBag.CurrentSort })
 </th>
 <th>
  @Html.ActionLink("Email", "Index", new { sortBy = "Email", currentSort = ViewBag.CurrentSort })
 </th>
 <th>
  @Html.ActionLink("Age", "Index", new {sortBy = "Age", currentSort = ViewBag.CurrentSort })
 </th>
 <th></th>
 </tr>

@foreach (var item in Model) {
 <tr>
 <td>
  @Html.DisplayFor(modelItem => item.Name)
 </td>
 <td>
  @Html.DisplayFor(modelItem => item.Sex)
 </td>
 <td>
  @Html.DisplayFor(modelItem => item.Email)
 </td>
 <td>
  @Html.DisplayFor(modelItem => item.Age)
 </td>
 <td>

 </td>
 </tr>
}

</table>
}
<div id="Paging" style="text-align:center">
 @*总页数是否小于当前页,小于就说明没数据,赋值0,否则赋值PageNumber*@
 Page @(Model.PageCount< Model.PageNumber?0:Model.PageNumber) of @Model.PageCount
 @Html.PagedListPager(Model, page => Url.Action("Index", new { page}),PagedListRenderOptions.Classic)
</div>
AddStudent视图:
@model PagingAndSortingInMVC.Models.Student

@{
 ViewBag.Title = "AddStudent";
}

<h2>AddStudent</h2>


@using (Html.BeginForm())
{
 @Html.AntiForgeryToken()

 <div class="form-horizontal">
 <h4>Student</h4>
 <hr />
 @Html.ValidationSummary(true, "", new { @class = "text-danger" })
 <div class="form-group">
  @Html.LabelFor(model => model.Name, htmlAttributes: new { @class = "control-label col-md-2" })
  <div class="col-md-10">
  @Html.EditorFor(model => model.Name, new { htmlAttributes = new { @class = "form-control" } })
  @Html.ValidationMessageFor(model => model.Name, "", new { @class = "text-danger" })
  </div>
 </div>

 <div class="form-group">
  @Html.LabelFor(model => model.Sex, htmlAttributes: new { @class = "control-label col-md-2" })
  <div class="col-md-10">
  @Html.EditorFor(model => model.Sex, new { htmlAttributes = new { @class = "form-control" } })
  @Html.ValidationMessageFor(model => model.Sex, "", new { @class = "text-danger" })
  </div>
 </div>

 <div class="form-group">
  @Html.LabelFor(model => model.Email, htmlAttributes: new { @class = "control-label col-md-2" })
  <div class="col-md-10">
  @Html.EditorFor(model => model.Email, new { htmlAttributes = new { @class = "form-control" } })
  @Html.ValidationMessageFor(model => model.Email, "", new { @class = "text-danger" })
  </div>
 </div>

 <div class="form-group">

  @Html.LabelFor(model => model.Age, htmlAttributes: new { @class = "control-label col-md-2" })
  <div class="col-md-10">
  @Html.EditorFor(model => model.Age, new { htmlAttributes = new { @class = "form-control" } })
  @Html.ValidationMessageFor(model => model.Age, "", new { @class = "text-danger" })
  </div>
 </div>

 <div class="form-group">
  <div class="col-md-offset-2 col-md-10">
  <input type="submit" value="Create" class="btn btn-default" />
  </div>
 </div>
 </div>
}

<div>
 @Html.ActionLink("Back to List", "Index")
</div>

<script src="~/Scripts/jquery-1.10.2.min.js"></script>
<script src="~/Scripts/jquery.validate.min.js"></script>
<script src="~/Scripts/jquery.validate.unobtrusive.min.js"></script>
接着修改一下布局页:
<!DOCTYPE html>
<html>
<head>
 <meta charset="utf-8" />
 <meta name="viewport" content="width=device-width, initial-scale=1.0">
 <title>@ViewBag.Title - My ASP.NET Application</title>
 <link href="~/Content/Site.css" rel="stylesheet" type="text/css" />
 <link href="~/Content/bootstrap.min.css" rel="stylesheet" type="text/css" />
 <script src="~/Scripts/modernizr-2.6.2.js"></script>
</head>
<body>
 <div class="navbar navbar-inverse navbar-fixed-top">
 <div class="container">
  <div class="navbar-header">
  <button type="button" class="navbar-toggle" data-toggle="collapse" data-target=".navbar-collapse">
   <span class="icon-bar"></span>
   <span class="icon-bar"></span>
   <span class="icon-bar"></span>
  </button>
  @Html.ActionLink("Application name", "Index", "Home", new { area = "" }, new { @class = "navbar-brand" })
  </div>
  <div class="navbar-collapse collapse">
  <ul class="nav navbar-nav">
   @Html.ActionLink("Student List","Index")
   @Html.ActionLink("Add Student ", "AddStudent")
  </ul>
  </div>
 </div>
 </div>

 <div class="container body-content">
 @RenderBody()
 <hr />
 <footer>
  <p>© @DateTime.Now.Year - My ASP.NET Application</p>
 </footer>
 </div>

 <script src="~/Scripts/jquery-1.10.2.min.js"></script>
 <script src="~/Scripts/bootstrap.min.js"></script>
</body>
</html>
修改一下默认路由:
using System;
using System.Collections.Generic;
using System.Linq;
using System.Web;
using System.Web.Mvc;
using System.Web.Routing;

namespace PagingAndSortingInMVC
{
 public class RouteConfig
 {
 public static void RegisterRoutes(RouteCollection routes)
 {
  routes.IgnoreRoute("{resource}.axd/{*pathInfo}");

  routes.MapRoute(
  name: "Default",
  url: "{controller}/{action}/{id}",
  defaults: new { controller = "Student", action = "Index", id = UrlParameter.Optional }
  );
 }
 }
}
运行项目:
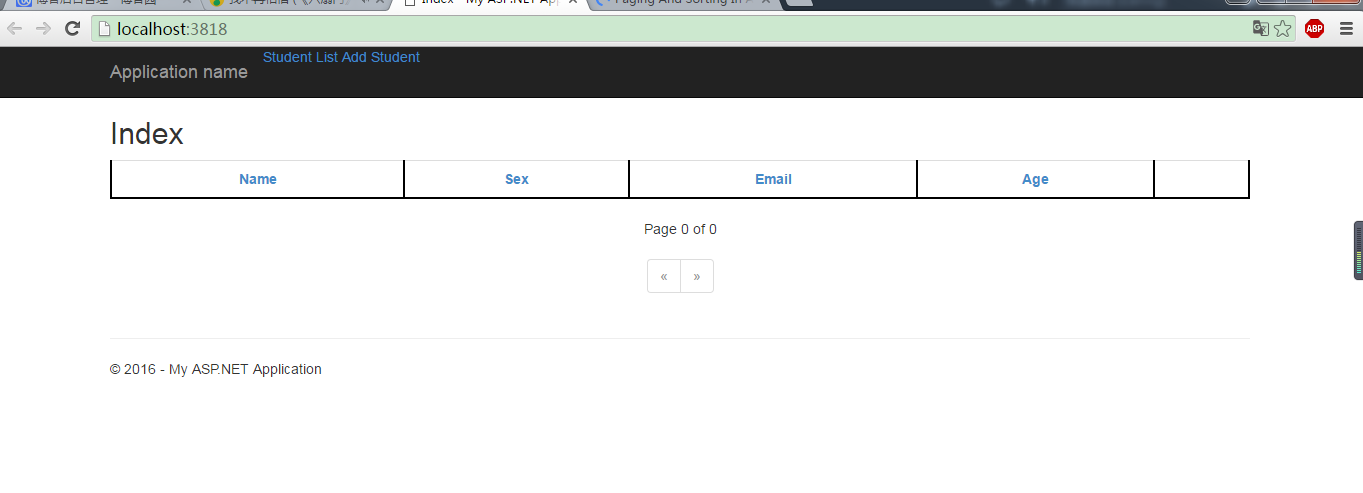
刚开始没有任何数据,我们添加几条测试数据:

我们来验证一下,结果:

看到了么,点击相应的列标题就可以进行排序了。分页也实现了。当然分页的样式可以通过改变这个选项:
@Html.PagedListPager(Model, page => Url.Action("Index", new { page}),PagedListRenderOptions.Classic)
这里,我修改了一下
@Html.PagedListPager(Model, page => Url.Action("Index", new { page}),PagedListRenderOptions.TwitterBootstrapPager)
分页控件的效果就是这样了。

好了,这篇文章到此结束。
总结:分页和排序是很重要的功能,需要熟练掌握。
以上就是本文的全部内容,希望对大家的学习有所帮助,也希望大家多多支持PHPERZ。